Friday, 20 March 2015

I had these in a restaurant very long time back and since then I wanted to try these. But was quite unsure if it would turn so crisp like the restaurant ones. Just gave a try and realized how easy it is. Crispy sweet corn kernels tosses in kind of  a Chinese stir fry. We just loved it and you can make it how spicy or saucy you like them.


You Will Need:
Boiled Corn Kernels from a Cob
A tbsp of corn flour
A tbsp of Maida
Salt & Pepper to Season
Oil for Deep Frying

Other Ingredients:
A tbsp of Oil
2 Green Chillies Finely Chopped
2 Sprigs of Spring Onion, Finely Chopped
2 Garlic Cloves, Finely Grates
A tso of Soy Sauce
A tsp of Tomato Ketchup
Pinch Salt
Little Chili Flakes

The Cooking:
Heat oil on high to deep fry. Mix the sweet corn kernels with corn flour, maida, salt and pepper. Just sprinkle little water and toss everything together.

NOTE: Adding too much of water will make the batter wetter and the corn kernels will clump together and won't separate when fried.

Now once the oil is hot, take handful of kernels and carefully sprinkle on to the hot oil. Fry till the corn becomes really crispy and crunchy.

Note: Do not crowd the oil by adding to much of corn. It will take much longer to get crisp and won't be crisp enough. Be careful since the corn may burst sometimes. So stand a feet away from the oil.

Once they turn nice crispy drain them on to a kitchen paper.

Heat tbsp of oil on a pan and add the green chilies, onions and garlic cloves. Saute on medium till the onions are soft. Then add soy, ketchup, salt and chili flakes. Saute for a min and add the fried corn kernels. Toll well till everything is well combined. Transfer to a plate and serve immediately.

Happy Blogging!


0

The cuisine of Udupi is plain delicious. And these buns are from the kitchen's of Udupi. The term "buns" are very misleading actually. When hubby mentioned he wants Mangalore Buns I thought them to be some kind of yeast savory buns. But when I looked up in the internet I was surprised to learn it had nothing to do with baking or yeasts. Its actually nothing but pooris that are flavoured with banana. I wonder how they came up with such a name. But I have to tell you I really loved it. Its super simple to make and it has this delicate sweet banana flavour coming through.


 You Will Need:
2 Cups of Plain Flour
1 Large Ripe Banana, Mashed
2 tbsp Yogurt
2 - 3 tbsp Powdered Sugar (according to your taste)
A tbsp of Powdered Almond (Optional, I Just added)
A Generous Pinch of Salt
1/2 tsp of Cardamom Powder
1/4 tsp of Baking Soda
A tbsp of Ghee
Oil to Deep Fry

The Cooking:
Place all the ingredients in a bowl and mix well to form a non sticky dough. Divide them into small balls and roll them out to a thickness of a 5 rupee coin. Its just like how you would make a poori. Heat oil in a kadai to deep fry. Once the oil is hot carefully drop in the buns. Gently slide the bun along the sit of the kadai to avoid hot oil splashing. Wait till the bun surfaces and once they surface from the bottom using your ladle splash the oil on the top. This helps them to puff up evenly. If you have made poori before it the same thing. Once fully puffed flip to other side and fry for few seconds till they are a light golden brown colour. Place them on a kitchen towel to absorb any excess oil.
Serve hot!

Happy Cooking!

1

Thursday, 12 March 2015

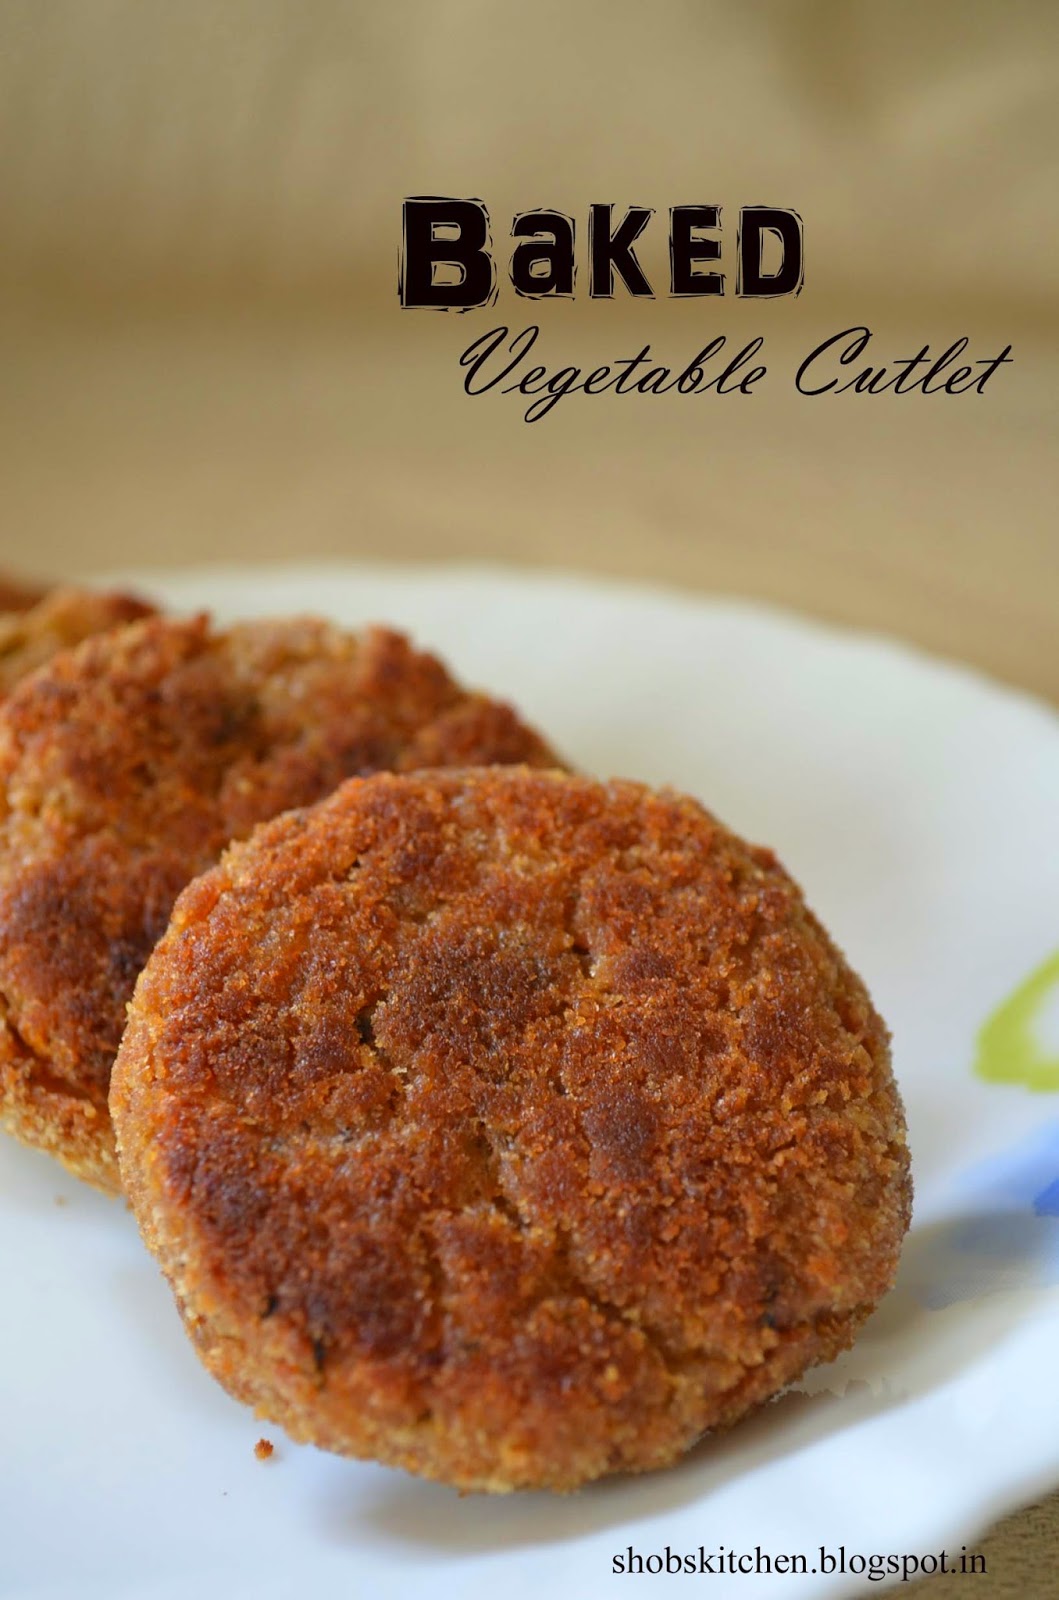
Cutlets brings back my school memories. I remember my mom making it for my after school snack and the smell of cutlets frying would hit me as soon as I enter the house. Her's are the best I have ever tasted. And cutlets were the only way she made me eat beets and french beans. Its been years since she made it again. And now I made them for Little A. And what an hit it was. Not only Little A loves it but his dad too. 


Cutlets are basically veggie patties that are shaped and crumb coated to deep fry. But I baked them.Cutlets are actually a healthy snack. Why deep fry them and make them unhealthy? And baking is much more easier and there is no compromise on the crisp outside. There is one small trick to get crisp outside when baking cutlets and I will be telling you that later in the post.


I was so happy when I made these. It bought back a lot of old memories. Little A could not wait to eat these straight from the oven. He kept walking (Yes, he has just begun to walk unsupported) into the kitchen; asking me to lift him and he kept pointing the oven demanding he wanted one right now. 

You Will Need:
4 Medium Sized Potatoes, Peeled, Cooked till Soft & mashed
1 Medium Sized Onion, Finely Chopped
1/2 tsp of Ginger Garlic Paste
1 Large Tomato, Finely Chopped
1 Large Carrot, Finely Chopped
6 French Beans, Finely Chopped
1/4 Cup of Cooked Peas
1 Small Beetroot, Finely Chopped
A tbsp of Finely Chopped Parsley / Coriander Leaves

***All the veggies can either be steamed beforehand or sauteed in the masala to cook. I prefer sauteing them.

Other Ingredients:
1/2 tsp Garam Masala
1/2 tsp of Cumin Powder
Salt to Taste
Some Freshly Cracked Pepper
Some vegetable Oil 
2 Cups of Plain Breadcrumbs, Homemade / Store-bought 
2 tbsp of Corn flour / flour 

The Cooking:
Step 1:
Making the Filling:
Heat a non - stick pan on High and add 2 tbsps of oil. Once hot add the onions and saute till pink and translucent. Then add the ginger garlic paste and saute for 2 mins. The onions SHOULD NOT BROWN. They just have to be soft and translucent. Then add the tomatoes and saute for 2 mins on high. Now add the salt, black pepper, garam masala and cumin powder. Saute for a min or so till the spices are cooked. Then tumble in the finely chopped carrots, beans & beets. Mix well and add little water and cover to cook the veggies. Since they are finely chopped they cook quickly with very less water. After 5 mins give a good stir and cook till any excess water has Vaporized. 

Now add the peas and chopped parsley. Mix well. The veggies should be dry at this stage. Add the mashed potato and mix well until the vegetables are well combined with the potatoes. At this point sprinkle over 2 tbsp of breadcrumbs. They absorb any excess water if any. Mix well on low heat and check seasoning. Take off heat and let it cool.

Step 2:
Make the slurry: 
You can either use one beaten egg or cornflour slurry to roll the cutlets. To make the slurry just place the flour on a shallow plate / bowl and add little water to make a thin paste. The slurry should not be runny but little thin. Keep aside.

Step 3:
Making the Cutlets:
Once the filling is cool enough to handle made balls out of them and mold to a cutlet shape. You can even use an oiled cookie cutter to make different shapes. 

Place the breadcrumbs in a plate. Take a cutlet and dip it in the slurry prepared earlier. Then roll them over the breadcrumbs. Pat the breadcrumbs well into the cutlet and shake off the excess. Repeat this for the entire batch. At this point you can either straight away bake them or refrigerate them for later. To freeze just place them in ziploc and freeze. 

Step 4:
Baking the Cutlets:
Preheat oven to 200 degree celcius 
Take a baking tray and line with foil. Brush oil over the foil. Now place the cutlets an inch apart and brush them throughly top, bottom and sides of the cutlet with oil. This is the key for getting crisp cutlets. You don't have to generously brush them with oil but just so they coat well. 

Place it in the hot oven for 35 - 40 mins flipping them over half way through. Once they are golden brown take them off and serve with tomato ketchup!

Happy Cooking!


0

Monday, 9 March 2015

These Homemade Chicken Nuggets are out of the world. Moist in the inside and crunchy on the outside. These make quick starters when you have guests around. And I must tell you how much little A liked it. He is more of a fish lover than a chicken lover. But this time he just devoured these. These need very little ingredients and no marination time (but you can if you want to). 


Nuggets have breadcrumb coating. And for this recipe I actually coated the chicken with a mix of breadcrumb and crushed plain corn flakes for that extra crunch. I used Homemade Breadcrumbs, never really liked store bought ones. 


P.S. 
DO NOT confuse this with KFC chicken. Though it looks like one it is NOT KFC! 

You Will Need:
500g Boneless Chicken fillet
1/2 Cup of Thick Yogurt, Whisked
A tsp of Italian Seasoning 
Salt to Taste
Freshly Cracked Pepper to Season
Oil to Deep fry

For the Crumb Coating:
4 - 5 Bread Slices
A Cup of Cornflakes

The Cooking:

Cut the chicken into strips or cubes and pat dry. Mix the chicken with yogurt, seasoning, salt & pepper. Keep Aside. Its not mandatory to marinate the chicken. You can of course prepare this well ahead if you are serving guests later.

Place the bread and cornflakes in a food processor and blitz till fine. I actually crumbled the bread and crushed the cornflakes by hand. So to get a very rustic looking coating. You can do either whichever you like. Spread the crumb coating on a plate. Meanwhile heat oil to deep fry.

Now roll the chicken over the crumb coating one at a time. Make sure to gently press the chicken for an even coat. Shake off the excess and place it on a plate. Once the oil is hot deep fry in batches till the chicken is cooked through and crisp. Deep fry on medium heat to make sure the coating does not brown too soon.

Once done place the chicken on a kitchen paper to drain off the excess oil.Serve hot with a dip or just as it is. 

Happy Cooking! 

0

I always have a day old or stale bread laying around in my kitchen counter. And the best you can do with it is made some Breadcrumbs. I have never liked the store bought ones. I find them to be too fine and sweet. I like how I can control the texture of the crumbs.  I can make it fine or a bit coarse; seasoned or just plain. 

How to Make Breadcrumbs?
Take some day old bread. It can be white bread or whole wheat or brown bread. I even use a combination of both white and whole wheat bread. But Never use sweet bread. Just roughly tear it and throw it in a food processor. Close the lid and just process until how you want them to be. Transfer it to an air tight container or a Ziploc bag and use according to the recipe.

Freezing Breadcrumbs:
Once the breadcrumbs are done transfer them to a resealable bag or an air tight container and simply place it in the freezer. These can be freezed up-to 3 months. At the time of using it let it thaw in the fridge and use accordingly. 

Refrigerating Breadcrumbs:
Breadcrumbs can be stored in the fridge for just few days.  

How to Make Seasoned Breadcrumbs:
  • Add some ground cumin, salt and paprika to the breadcrumbs for a spiced crumb.
  • Add some garlic powder, finely grated Parmesan or cheddar for a cheesy twist. 
  • Add some finely chopped thyme, rosemary, dill, parsley, sage, oregano for a herb crust. Alternatively you can also use dried herbs.
Happy Cooking!

0

Friday, 6 March 2015

Recently I have been on the lookout for healthy bakes for Little A. Since eating anything without offering him is impossible I take along some healthy snack for him during travel for him to munch on. Though these muffins are made with whole wheat flour and has less sugar I would limit this as a treat for babies. But for adults these are perfect if you want some yummy healthy snack on the go.  They are so moist and fluffy and amazingly easy to whip up and bake.


Makes a Dozen

You Will Need:

2.5 Cups of Whole Wheat Flour
1/3 Cup of Light Brown Sugar
1/3 Cup of Vegetable oil
1 tsp Baking Powder
1 tsp Baking Soda
1 tsp Vanilla Extract
A Pinch of Ground Cinnamon
1 Large Egg
1.5 Cups of Finely Chopped Apples with Skin
1 Cup of Buttermilk***
A Generous Pinch of Salt

Muffin Topping (Optional, I simply skipped):
Cinnamon
Sugar
Melted Butter

The Baking:

Preheat oven to 180 Degree Celcius and grease a muffin pan.
In a large bowl pour in the oil, buttermilk, brown sugar, vanilla and egg. Whisk this till smooth using a hand blender / wire whisk. In another bowl sift in whole wheat flour, baking powder, baking soda, salt and cinnamon. Now simply add the dry ingredients into the wet ingredients and mix until just combined. 

NOTE: This is a very thick batter almost like a dough. But DO NOT OVERMIX or add excess liquid. If overmixed or batter made a little thin the muffins will turn out dense and hard.

Finally fold in the apples and spoon into the greased muffin tin using a table spoon or an ice cream scoop (this works best for me). Fill the muffin batter all the way to the top so that they raise high. Now if you are making the muffin topping, generously spoon over each muffin and bake in a preheated oven for 15 mins or until a cake tester inserted in the middle comes out clean and the top is crunchy.

***Substitution for Buttermilk.
Take 1 cup of milk and add a tbsp of vinigar / lime juice. Let it for rest for 10 mins before using in the recipe.
OR
Take ¾ cup of milk and stir in ¼ cup of yogurt. Mix and use in the recipe.


Happy Baking!
0

Monday, 16 February 2015

I bake a lot of plain cakes. My family is not a fan of sweet rich frosting and they prefer to have simple no frosting cakes. But I have a terrible sweet tooth and I jump at any opportunity to whip up something sweet. Now I know this space has been quite for a very long time. And thats because little A is just growing naughtier by day and did I tell you he just turned 1!!!! And I have been wanting to bake a birthday cake for long and I just baked one for little A. Its a three layered two tier cake with handmade cake bunting by my daddy! 


The bottom tier is two layers of chocolate cake with one layer of buttermilk cake and the top tier is three layers of buttermilk cake filled with strawberry mousse and frosted with vanilla buttercream. The cake was yum! And the buttercream was super fluffy and delicious. 


It was perfect. There are a million buttercream recipe out there and each has their own. But I loved the buttercream recipe from Cooking Classy. To crumb coat and cover this 8" and 6" tier cake I had to double this recipe. 


Buttercream frosting is the easiest of all frosting. Just few tips and it turns out so perfect and yum. Its a really sweet frosting unlike Swiss / Italian Meringue. 


Tips for a smooth and fluffy frosting:
  • Use good quality butter at room temperature. Butter should be soft and not runny or overly melted.
  • Sift the powdered sugar couple of times to make sure no lumps are there.
  • Homemade powdered sugar also can be used but store bought ones are convenient and gives that smooth consistency. 
  • Beat the butter really really pale. It should become almost white and fluffy.
  • Make sure to scrap the side of the bowl every time you add icing sugar and beat. Once all the icing sugar is added keep beating for 3 mins. 
  • If adding color add few drops at the end and mix to combine.
  • Bring frozen or chilled buttercream to room temperature and beat for a min or two before using. 

You Will Need:
Makes enough frosting to fill and cover a 3 layer 8 inch layer cake
1 1/2 Cups or 340 gm of Unsalted Butter, room temperature 
500gm Icing Sugar
3 tbsp of Heavy Cream 
1.5 tsp Vanilla Extract
A Pinch of Salt

Direction:

Step 1:
Place the unsalted butter in a large bowl and cream using a hand mixer till the butter is fluffy and really pale in color. Almost white. This will take around 5 - 7 mins approx

Step 2:
Add a cup of icing sugar and beat again scraping the sides until the sugar is well combined. Continue the process till all the icing sugar is used up, adding one cup at a time. 

Step 3:
Add the vanilla extract, salt and heavy cream and beat another 3 mins. The frosting should be fluffy and light when you run your fingers onto the buttercream. Use immediately or you can store in the fridge in an air tight container. 

PS: No need to scrap the bowl clean. Leave some behind he lick off later. Its that Yum! 

Happy Frosting!


0

Sunday, 11 January 2015

I actually baked this cake for last year's Christmas. Yeah it is supposed to be a Non Alcoholic Christmas cake with ground spices but its not quite our favorite. Hence I made a FRUIT & NUT CAKE, a special request from Big A (who particularity insisted there be no cinnamon...poor guy hates it and I usually add it to everything muhahaha)!!! Its just a basic vanilla cake with dried fruit and nuts of our choice. Moist and perfect for non Christmas cake lovers like us. 


Makes One 9 Inch Round Cake
Recipe very Slightly Adapted from HERE

You Will Need:
100 gms Unsalted Butter, Room Temperature
1/2 Cup Tightly Packed Dark Brown Sugar (White Sugar also works fine)
2 Large Eggs
1 tsp of Vanilla Extract
1 Cup of Plain Flour (Scoop out a tbsp of flour to toss with the fruit and nuts)
1 tsp Baking Powder
1/4 tsp Baking Soda
A Pinch of Salt

1/4 Cup of Whole Milk
1/4 Cup of Tutti Fruti
2 tbsp of Dried Cranberries
2 tbsp of Chopped Glazed Cherries
2 tbsp of Raisins
10 Cashew Nuts, Broken
10 Almonds, Roughly Chopped
10 Walnuts, Broken

***You can add any dry fruits and nuts in addition to the above mentioned. And add more or less depending on how much you like. I prefer a little less.

The Cooking:

Preheat oven to 160 degree Celsius and grease a 9 inch round cake pan.

Sift together flour, salt, baking powder and baking soda into a bowl.

In another bowl cream the butter till pale. Now add the sugar and beat for another 5 mins till the butter and sugar is light and fluffy. Now beat in one egg at a time making sure you incorporate well after each addition. Pour in the vanilla extract and beat again for few seconds. Make sure you scrape the sides of bowl so that the batter is evenly combined. Now gently fold half of the flour mixture. Pour in the milk and mix. Add the remaining flour and fold again making sure there is no lumps.  

Combine the dry fruits & nuts in a bowl and add the tbsp of flour. Toss till the flour has coated the nuts and fruits. Now fold this into the cake batter. DO NOT BEAT OR OVER MIX. This process of tossing the fruits & nuts in the flour will help them from sinking to the bottom while baking.

Pour the batter into the prepared cake tin and bake in the preheated oven for 40 - 45 mins or until when a skewer inserted in the middle comes out clean, Be sure to check the cake after 35 mins since the temperature and time will vary for different ovens.

Happy Baking!


0

Saturday, 10 January 2015

When I was a child I remember my mom churning butter at home. She used to buy fresh cow's milk for me and collects the malai to churn butter. I remember sitting next to her while she churns the butter and I used to stick my finger in, scrape off the butter and lick it. It was so delicious. And with that freshly churned butter she made ghee. Ah the entire house would smell divine. This is my first HOMEMADE GHEE. I never bothered making it home. Store boughts were too convenient. Since Little A is on solids now I wanted to make ghee at home for him. 


But, Its super easy making at home. You let the butter melt and turn off the gas after the crackling stops. That's it no stirring or no techniques really.  When you heat butter, it melts and begins to boil which makes the crackling sound. Then the milk solids separates forming a white split layer on top and then it sinks to the bottom and gets toasted. That's the sediment. Final product is this beautifully amber colored Ghee / clarified butter. I loved picturing this actually. The color was so beautiful nothing like I have seen before and I just wanted to capture it. That's you will find lot of pictures in this post. Its just too beautiful not to share. 


You Will Need:
500gm Unsalted Butter, Room Temperature or chilled it does not matter
A Heavy Bottom Pan
A Fine Strainer, Metal / Cloth (metal works better)
Clean & Dry Air Tight Container
Some Curry Leaves or Drumstick Leaves (Optional, But recommended)

The Cooking:
Place a heavy bottom pan on low heat and place the butter. Let the butter melt fully and you will begin to hear some crackling noise while the butter is melting. Once the butter is fully melted it will begin to gently bubble and soon you will notice the butter splitting. They are milk solids separating from the butter. After 10 - 15 mins the crackling noise will subside (add curry leaves / drumstick leaves at this stage) and the melted butter will begin to foam up slowly raising from the pan. Turn off the heat and let the ghee rest for few mins.

Then simply strain them into an air tight container.

NOTE:

  • You don't have to keep stirring the melted butter at any point. It wont stick or get burnt in the bottom. Just let it be on a low heat.
  • Once the crackling noise stops, your ghee is done. That's the key indication.
  • Do not discard the sediments. They are just fried milk solids and they taste yum. I just had them with a spoon.
  • Also add some rice to the pan and mix it with whatever is sticking to your pan. It tastes divine. You really don't want to waste anything.
Have you checked out this Month's Event + Giveaway on the blog! Do take a peek HERE!

Happy Cooking!
4

Author

Search this blog