Thursday 23 January 2014

#4 Amma's Recipe

I have absolutely NO IDEA what this dish is called, nor does my mom who actually prepared this today for our lunch and taught me for the first time. She learnt this on her trip to Madurai way back before I was even born. She tasted this dish at a small 'hotel' (if you can even call that a hotel with a small kitchen that hardly gives way for more than two people) and was totally blown by it. She immediately requested the cook for the recipe and he was kind enough to take her through every step of its preparation. She immediately tried it as soon as she was back home and since then its been a Hit. And she swears till today, that she has never had the same cauliflower dish in any of the hotels again or never even seen it being prepared at any of the weddings. This is truly her most treasured recipe and if any of you have had this dish at any of the hotels or at anybody's home, do let me know I am all ears for your story! 


Now its a little time consuming to cook this dish but nevertheless I promise you will be blown by the flavours of it. This compliments absolutely anything; rice, roti, sambar rice, curd rice and they even taste great stuffed inside dosa and bread! 

Serves 5
You Will Need:

2 Large Onions, Sliced
2 Large Tomatoes, Roughly Chopped
1/2 Cup Water
Few Curry Leaves
Some Coriander Leaves, Roughly Chopped
Oil to Deep Fry
Salt to Season the Masala

For the Cauliflower:

1 Large Cauliflower
200g Besan Flour
Salt, Only to Season the Cauliflower
Pinch Red Food Colouring (Optional, we never use it)

For Masala:

2 inch Ginger
12 Cloves of Garlic
6 Cashew Nuts
A tbsp of Fennel Seeds
A tbsp of Cumin Seeds
2 Cardamom Pods
3 Cloves
1 Cinnamon Stick
1-1/2 tso Chilli Powder
1/4 tsp Turmeric Powder

The Cooking:

Cut the cauliflower into medium sized florets. Add them to salted boiling water and let it cook for 5 mins. Drain and place it in a large bowl. Add the besan flour and salt and mix sprinkling just enough water to bring everything together. 

Note: Cut the cauliflower into medium florets. There are 3 stages in cooking the cauliflower so you don't want them to be too small and all mashed up.


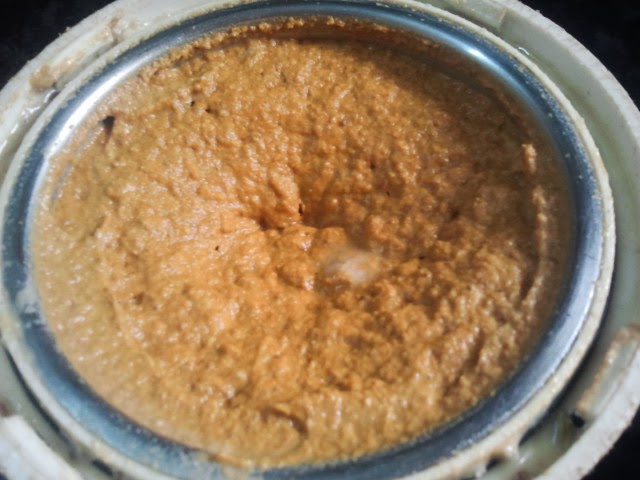
Place all the ingredients for the masala in a blender and grind it to a thick smooth paste adding little water. Keep aside until needed.


Heat oil to deep fry the cauliflower. Once the oil is hot add the cauliflower in batches. Fry on high heat till the cauliflower is just cooked but NOT CRISP! 

Note: Keep the heat high throughout frying the cauliflower, so that they don't soak up too much oil. 


Drain and keep aside. 


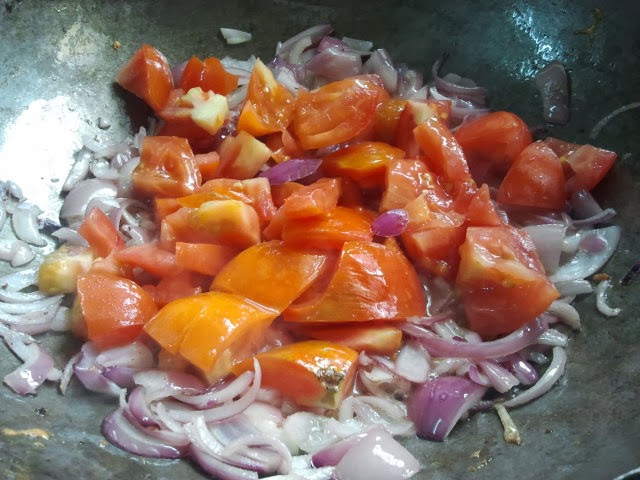
Heat 5 tbsp of Oil in a wok / a non - stick pan. Once the oil is hot add the sliced onions and sauté till pink and translucent. The onions need not brown since they will be further cooked in the masala. 


Now add the chopped tomatoes and sauté for couple of mins on high. 


Now that's done, add the ground masala to the onions and tomatoes. Season with salt.


Give it a quick stir just to mix everything together.


Now pour in the water and cook for about 4 - 5 mins on high stirring occasionally till the masala starts to bubble up and thicken. 


Once the raw flavours of the masala are gone and the masala has begun to thicken add the fried cauliflower.


Give a good stir to evenly coat the cauliflower with the masala. Make sure you are gently with the cauliflower, you don't want them going all mushy. 


Keep the flame high till the cauliflower soaks up all the masala and stir occasionally making sure you reach all the way to the bottom and make sure nothing sticks. Once the cauliflower has soaked up all the masala lower the heat and continue to cook the cauliflower dries up. 


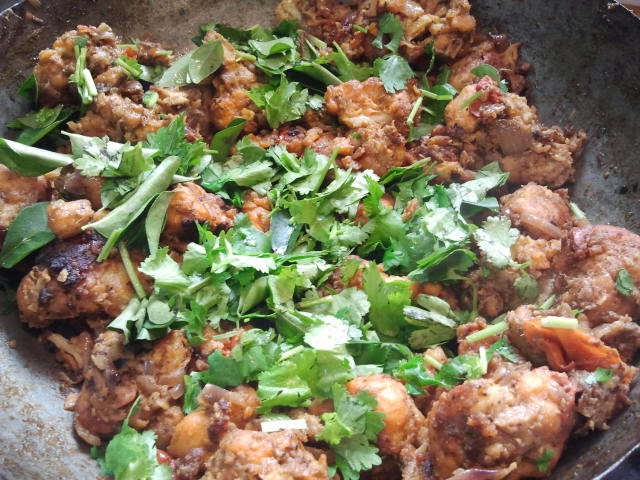
Finally add the curry leaves and chopped coriander leaves and mix everything together. Cook for another couple of mins before taking off heat.


Serve hot with roti / rice or even stuff it between slices of bread!


Happy Cooking!


0

Wednesday 22 January 2014

With less than 2 weeks to go before the arrival of the bundle of joy am still busy ticking off my 101 Things to Do Before the Baby Comes list. And cake baking is one of the things I have been keeping in pending for a very long time. Am back to my mom's home and I can hardly imagine baking a cake without my oven and baking tools. But I just couldn't say No to my brother who has been requesting and finally demanding for a cake from me. So I went back to how my mom baked her first cake when I was about 5 years old. Thank god for an old measuring cup that barely had any markings on it, a cake pan over 10 years old and a heavy bottom sauce pan I used to bake cake before we had an oven.


Without my hand held electric mixer I was back to creaming the butter in a large bowl with a heavy stainless steel spatula or ladle or whatever it is called. Yes a lot of muscle was required, I can already feel my biceps. 

Now about the cake, its a STRAWBERRY BUTTER CAKE filled and frosted with strawberry butter cream with fresh strawberry purée. The cake batter has a combination of strawberry flavoured jelly crystals and fresh strawberry purée. The jelly crystals gives a nice texture, sweetness and a lovely colour to the cake whereas the flavour comes from the purée. And the strawberry butter cream just adds even more berry punch to the cake. 


Now, I know my frosting is bad or even worse. But that was all I could manage with a plain old knife and a non rotating surface. Nevertheless, this was one moist strawberry cake and there was one happy brother!!!

You Will Need:

For the Cake:
Makes one 3 layer, 8 inch round cake 

227g of Unsalted Butter
3 Cups (300g) Cake Flour
A tbsp of Baking Powder
1-3/4 Cup (350g) of Sugar
4 Large Eggs
85g of Strawberry Jelly Crystals 
1/4 Cup (60ml) Fresh Strawberry Purée
1/2 Cup of Whole Milk
A tbsp of Vanilla Extract
3/4 tsp Salt

Strawberry Butter cream Frosting:

375g of Unsalted Butter
4 Cups (500g) Icing Sugar
A tbsp of Milk
45 ml Fresh Strawberry Purée
Pinch of Salt

Note: All ingredients must be at room temperature. 

The Baking:

For the Cake:
  1. Place about 2 handfuls of strawberries in a blender and purée the strawberries. 
  2. Preheat oven at 180c and grease or line with parchment paper three 8 inch round cake pan (I used one deep cake pan in my case)
  3. In a bowl, sift together the flour, baking powder and salt. Keep aside.
  4. In another whisk the strawberry purée, milk and vanilla extract.
  5. Cream the butter, sugar and jelly crystals in a large bowl for 5 mins till light and fluffy. 
  6. Break in the eggs one at a time and beat till each egg is well incorporated. 
  7. Now, add half the dry ingredients into the batter followed by half of the wet ingredients. Mix just until combined. Again add the remaining dry ingredients followed by the remaining wet ingredients and beat till everything is just combined. 
  8. Divide the batter into three greased / lined cake pans. you can also weigh each cake pan to make sure you have distributed the batter equally. With a spatula level the top and bake in a preheated oven for 25 - 30 mins or until a cake tester inserted in the centre comes out clean. Check cake at 20 mins but not before. 
  9. Once the cakes are baked let them cool on the cake pans for 10 mins. Then run a knife along the sides of the cake pans and loosen the cakes to invert them over a wire rack and let them cool completely. 
Note: They can be kept at room temperature for 2 days tightly wrapped with a cling film or stored in an air tight container. Or they can also be refrigerated for 5 days or frozen for 2 months. 

Also refer my older post for some helpful tips on Cake Baking

Making the Frosting:
  1. Place the butter in a bowl of a stand mixer / hand held electric mixer. Whip the butter till soft and pale for about 10 mins. 
  2. Add the icing sugar and vanilla extract and whip for another 8 - 10 mins till the butter cream is soft and fluffy. 
  3. Add the strawberry purée and mix till its well incorporated. 
Note: Sift the icing powder 2 or 3 times for smooth butter cream. Let the butter cream chill for 24 hrs, thaw and whip for one last time before frosting. 

Layering the Cake:

Once the cake layers are completely cooled, fill and frost the cake layers as desired. We prefer plain cakes or cakes with minimal frosting. Hence I have gone really thin on the frosting. But the recipe for frosting I have given is enough to thickly fill and frost 3 cake layers. 

Recipe adapted from allrecipes.com!
Happy Baking!


0

Thursday 2 January 2014

images (4) It's been over 2 years since the exchange of our wedding vows & a blissful marriage! So plans are being made for a romantic holiday for "three", yes we are towing a baby stroller along ;) Well after all the "Baby's Coming" drama, we both needed to be somewhere quite & peaceful ( Hey, the baby's bawl does not count).
andaman-islands 
ANDAMAN was our first choice, since I have already been there some years back and loved it I wanted my husband to experience the same.

14507_1
The crystal clear beaches, squishy white sand, the mangroves, the beautiful painted scenery and the exotic resorts by the bay! Ah, what can be more romantic?
images (1)So, I got my air tickets booked; my bags all packed (whoa, look at the size of that Diaper Bag!!!); got my Itinerary sorted out and have booked ourselves into a fabulous resort just few meters away from the shoreline, etc etc etc.....
images (3)Since its going to be and supposed to be a "Romantic Getaway" I have been quite bus y pampering myself at the Spa. The whole baby stuff has definitely taken its toll on me, and am desperate for some relaxing massages and some “me time”.
dry-frizzy-hairSnorkelling around and long hours on the beaches of Andaman is how we have planned this whole trip. And Sun and beach can be very harsh on your hair and I just can't tolerate sun damaged dry hair, such a turn off!!! Dry, tangled and frizzy arrggh…what’s romantic in that!

So this is where my tresses need a definite recharge. Protectionimages from the harsh tropical sunshine, endless number of dives into the deep blue and to still keep them silky and smooth for the romantic candle light dinner and later walks in the moon lit beach…of course, will be pushing the stroller along!
Recharge your Locks to lock in Romance, with Sunsilk !!! :)


Post written for Indiblogger, Recharge your Hair, Recharge your Life Contest by Sunsilk!

All images in this post are “Googled” images and the blogger does not take credit for any of the above images.

Happy Blogging!
0

Author

Search this blog