Showing posts with label Appetizers. Show all posts

Friday, 20 March 2015

I had these in a restaurant very long time back and since then I wanted to try these. But was quite unsure if it would turn so crisp like the restaurant ones. Just gave a try and realized how easy it is. Crispy sweet corn kernels tosses in kind of  a Chinese stir fry. We just loved it and you can make it how spicy or saucy you like them.


You Will Need:
Boiled Corn Kernels from a Cob
A tbsp of corn flour
A tbsp of Maida
Salt & Pepper to Season
Oil for Deep Frying

Other Ingredients:
A tbsp of Oil
2 Green Chillies Finely Chopped
2 Sprigs of Spring Onion, Finely Chopped
2 Garlic Cloves, Finely Grates
A tso of Soy Sauce
A tsp of Tomato Ketchup
Pinch Salt
Little Chili Flakes

The Cooking:
Heat oil on high to deep fry. Mix the sweet corn kernels with corn flour, maida, salt and pepper. Just sprinkle little water and toss everything together.

NOTE: Adding too much of water will make the batter wetter and the corn kernels will clump together and won't separate when fried.

Now once the oil is hot, take handful of kernels and carefully sprinkle on to the hot oil. Fry till the corn becomes really crispy and crunchy.

Note: Do not crowd the oil by adding to much of corn. It will take much longer to get crisp and won't be crisp enough. Be careful since the corn may burst sometimes. So stand a feet away from the oil.

Once they turn nice crispy drain them on to a kitchen paper.

Heat tbsp of oil on a pan and add the green chilies, onions and garlic cloves. Saute on medium till the onions are soft. Then add soy, ketchup, salt and chili flakes. Saute for a min and add the fried corn kernels. Toll well till everything is well combined. Transfer to a plate and serve immediately.

Happy Blogging!


0

The cuisine of Udupi is plain delicious. And these buns are from the kitchen's of Udupi. The term "buns" are very misleading actually. When hubby mentioned he wants Mangalore Buns I thought them to be some kind of yeast savory buns. But when I looked up in the internet I was surprised to learn it had nothing to do with baking or yeasts. Its actually nothing but pooris that are flavoured with banana. I wonder how they came up with such a name. But I have to tell you I really loved it. Its super simple to make and it has this delicate sweet banana flavour coming through.


 You Will Need:
2 Cups of Plain Flour
1 Large Ripe Banana, Mashed
2 tbsp Yogurt
2 - 3 tbsp Powdered Sugar (according to your taste)
A tbsp of Powdered Almond (Optional, I Just added)
A Generous Pinch of Salt
1/2 tsp of Cardamom Powder
1/4 tsp of Baking Soda
A tbsp of Ghee
Oil to Deep Fry

The Cooking:
Place all the ingredients in a bowl and mix well to form a non sticky dough. Divide them into small balls and roll them out to a thickness of a 5 rupee coin. Its just like how you would make a poori. Heat oil in a kadai to deep fry. Once the oil is hot carefully drop in the buns. Gently slide the bun along the sit of the kadai to avoid hot oil splashing. Wait till the bun surfaces and once they surface from the bottom using your ladle splash the oil on the top. This helps them to puff up evenly. If you have made poori before it the same thing. Once fully puffed flip to other side and fry for few seconds till they are a light golden brown colour. Place them on a kitchen towel to absorb any excess oil.
Serve hot!

Happy Cooking!

1

Thursday, 12 March 2015

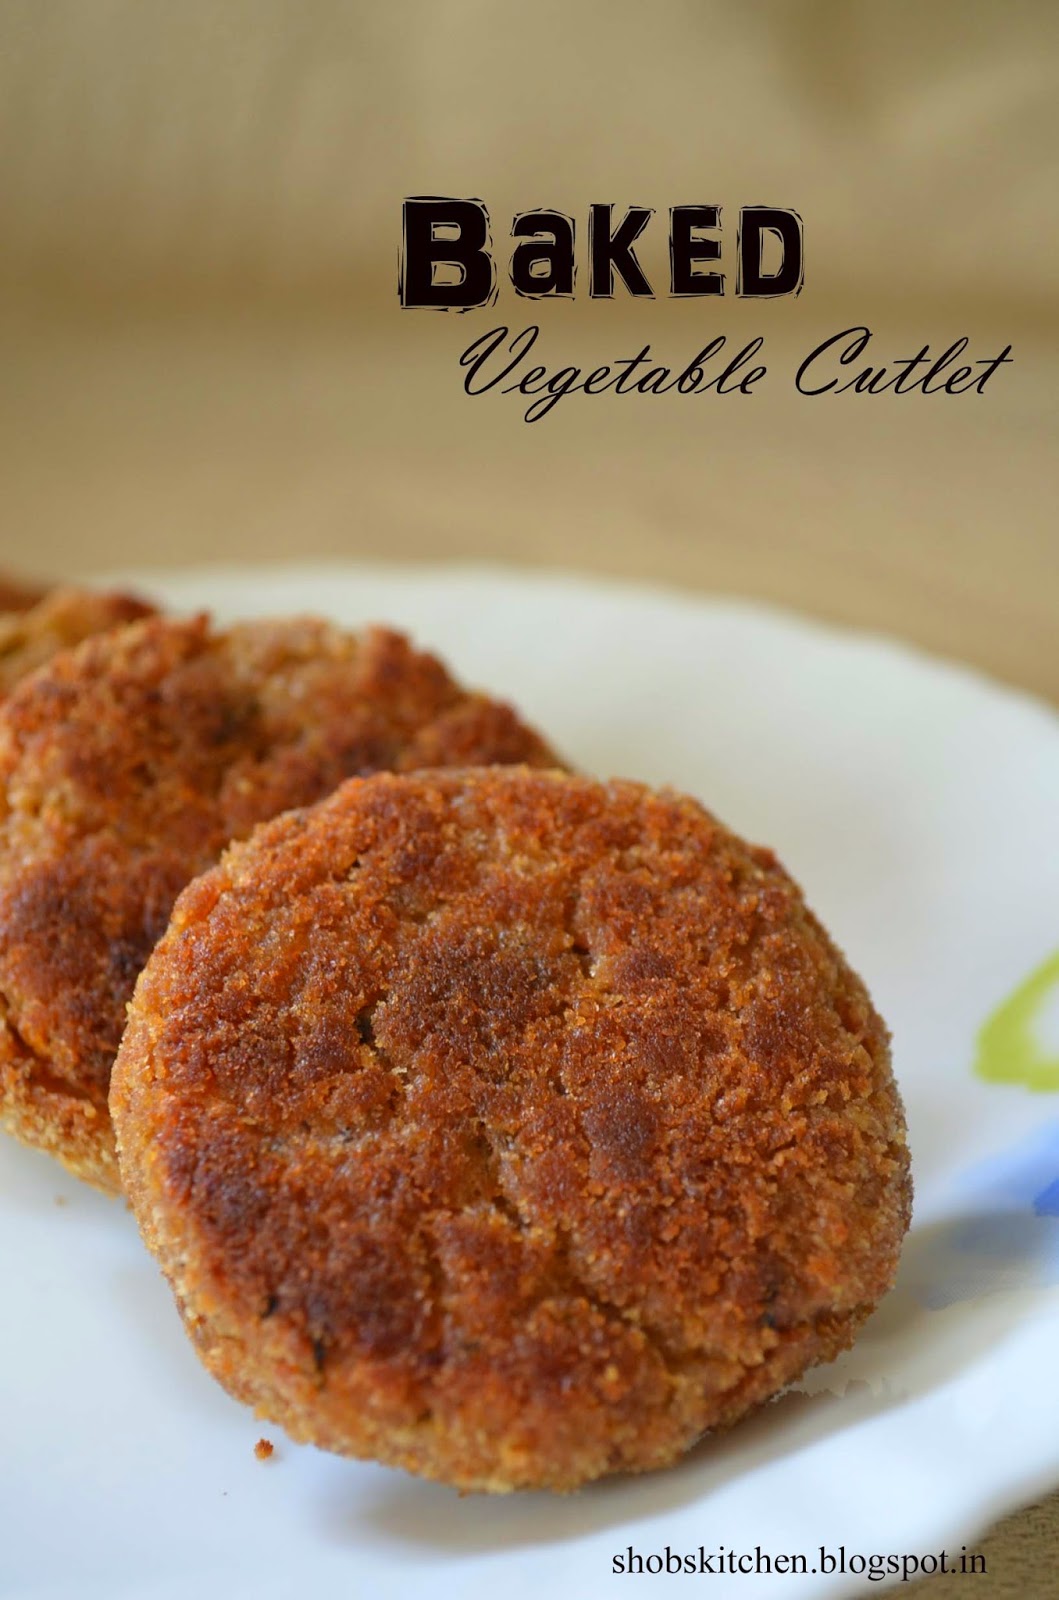
Cutlets brings back my school memories. I remember my mom making it for my after school snack and the smell of cutlets frying would hit me as soon as I enter the house. Her's are the best I have ever tasted. And cutlets were the only way she made me eat beets and french beans. Its been years since she made it again. And now I made them for Little A. And what an hit it was. Not only Little A loves it but his dad too. 


Cutlets are basically veggie patties that are shaped and crumb coated to deep fry. But I baked them.Cutlets are actually a healthy snack. Why deep fry them and make them unhealthy? And baking is much more easier and there is no compromise on the crisp outside. There is one small trick to get crisp outside when baking cutlets and I will be telling you that later in the post.


I was so happy when I made these. It bought back a lot of old memories. Little A could not wait to eat these straight from the oven. He kept walking (Yes, he has just begun to walk unsupported) into the kitchen; asking me to lift him and he kept pointing the oven demanding he wanted one right now. 

You Will Need:
4 Medium Sized Potatoes, Peeled, Cooked till Soft & mashed
1 Medium Sized Onion, Finely Chopped
1/2 tsp of Ginger Garlic Paste
1 Large Tomato, Finely Chopped
1 Large Carrot, Finely Chopped
6 French Beans, Finely Chopped
1/4 Cup of Cooked Peas
1 Small Beetroot, Finely Chopped
A tbsp of Finely Chopped Parsley / Coriander Leaves

***All the veggies can either be steamed beforehand or sauteed in the masala to cook. I prefer sauteing them.

Other Ingredients:
1/2 tsp Garam Masala
1/2 tsp of Cumin Powder
Salt to Taste
Some Freshly Cracked Pepper
Some vegetable Oil 
2 Cups of Plain Breadcrumbs, Homemade / Store-bought 
2 tbsp of Corn flour / flour 

The Cooking:
Step 1:
Making the Filling:
Heat a non - stick pan on High and add 2 tbsps of oil. Once hot add the onions and saute till pink and translucent. Then add the ginger garlic paste and saute for 2 mins. The onions SHOULD NOT BROWN. They just have to be soft and translucent. Then add the tomatoes and saute for 2 mins on high. Now add the salt, black pepper, garam masala and cumin powder. Saute for a min or so till the spices are cooked. Then tumble in the finely chopped carrots, beans & beets. Mix well and add little water and cover to cook the veggies. Since they are finely chopped they cook quickly with very less water. After 5 mins give a good stir and cook till any excess water has Vaporized. 

Now add the peas and chopped parsley. Mix well. The veggies should be dry at this stage. Add the mashed potato and mix well until the vegetables are well combined with the potatoes. At this point sprinkle over 2 tbsp of breadcrumbs. They absorb any excess water if any. Mix well on low heat and check seasoning. Take off heat and let it cool.

Step 2:
Make the slurry: 
You can either use one beaten egg or cornflour slurry to roll the cutlets. To make the slurry just place the flour on a shallow plate / bowl and add little water to make a thin paste. The slurry should not be runny but little thin. Keep aside.

Step 3:
Making the Cutlets:
Once the filling is cool enough to handle made balls out of them and mold to a cutlet shape. You can even use an oiled cookie cutter to make different shapes. 

Place the breadcrumbs in a plate. Take a cutlet and dip it in the slurry prepared earlier. Then roll them over the breadcrumbs. Pat the breadcrumbs well into the cutlet and shake off the excess. Repeat this for the entire batch. At this point you can either straight away bake them or refrigerate them for later. To freeze just place them in ziploc and freeze. 

Step 4:
Baking the Cutlets:
Preheat oven to 200 degree celcius 
Take a baking tray and line with foil. Brush oil over the foil. Now place the cutlets an inch apart and brush them throughly top, bottom and sides of the cutlet with oil. This is the key for getting crisp cutlets. You don't have to generously brush them with oil but just so they coat well. 

Place it in the hot oven for 35 - 40 mins flipping them over half way through. Once they are golden brown take them off and serve with tomato ketchup!

Happy Cooking!


0

Monday, 9 March 2015

These Homemade Chicken Nuggets are out of the world. Moist in the inside and crunchy on the outside. These make quick starters when you have guests around. And I must tell you how much little A liked it. He is more of a fish lover than a chicken lover. But this time he just devoured these. These need very little ingredients and no marination time (but you can if you want to). 


Nuggets have breadcrumb coating. And for this recipe I actually coated the chicken with a mix of breadcrumb and crushed plain corn flakes for that extra crunch. I used Homemade Breadcrumbs, never really liked store bought ones. 


P.S. 
DO NOT confuse this with KFC chicken. Though it looks like one it is NOT KFC! 

You Will Need:
500g Boneless Chicken fillet
1/2 Cup of Thick Yogurt, Whisked
A tsp of Italian Seasoning 
Salt to Taste
Freshly Cracked Pepper to Season
Oil to Deep fry

For the Crumb Coating:
4 - 5 Bread Slices
A Cup of Cornflakes

The Cooking:

Cut the chicken into strips or cubes and pat dry. Mix the chicken with yogurt, seasoning, salt & pepper. Keep Aside. Its not mandatory to marinate the chicken. You can of course prepare this well ahead if you are serving guests later.

Place the bread and cornflakes in a food processor and blitz till fine. I actually crumbled the bread and crushed the cornflakes by hand. So to get a very rustic looking coating. You can do either whichever you like. Spread the crumb coating on a plate. Meanwhile heat oil to deep fry.

Now roll the chicken over the crumb coating one at a time. Make sure to gently press the chicken for an even coat. Shake off the excess and place it on a plate. Once the oil is hot deep fry in batches till the chicken is cooked through and crisp. Deep fry on medium heat to make sure the coating does not brown too soon.

Once done place the chicken on a kitchen paper to drain off the excess oil.Serve hot with a dip or just as it is. 

Happy Cooking! 

1

Monday, 29 December 2014

Am a novice in Bread Making and this CHEESY GARLIC PULL APART BREAD is my first ever bread I have baked. And guess what? I have been transformed from I love cakes & cupcakes to I love Bread Making. I don't know why I held myself off from bread making. Maybe working with yeast put me off? or I just don't know. But after trying this pull apart I have decided to plunge head down into bread making. The whole process of bread making is actually very therapeutic and much easier than I expected them to be. 

You can make this as cheesy as you want. We actually with a lot of cheese. Since I avoid cheese a lot we tend to go overboard sometimes just to treat our cheese craving. 


And ah I just loved the smell of bread baking in the oven. My entire house was wafting with the smell of garlic and herbs. Big A's face immediately lit up when he came home from office asking "Whats that lovely smell?" I love when he says that. 

Such a wonderful recipe for babies and toddlers too. Freshly baked with no preservatives are a safe bet for babies. Little A loved it too. It can be given as a treat or a one off thing to babies and as a snack for toddlers.    

I tried THIS recipe!

You Will Need:
3 tsp Active Dry Yeast
1 Cup of Warm Milk (Hand hot)
1/4 Cup of Warm Water (hand hot)
2 tsp of Sugar
3 tbsp of Olive Oil
1 Beaten Egg
3.5 Cups of Plain Flour
1 tsp Italian / Pizza / Garlic Bread Seasoning
3 tsp Garlic Powder 
1.5 tsp Salt
200g mozzarella Cheese
1/4 Cup grated Parmesan (Optional, I did not use)
1 Cup of shredded cheddar and mozzarella
1 tbsp Melted Butter
Basting on the top (Optional but Highly recommended):
1 tbsp Melted butter
1 tsp Finely Chopped parsley
1/2 tsp garlic Powder

The Cooking:

Step 1:
Pour the warm water and warm milk into a bowl and sprinkle over the yeast. Then add sugar and olive oil. Stir well and let it proof for 15 - 20 mins till foamy and frothy.

NOTE: If the yeast is not frothy by 30 mins at least you will have to discard the yeast and start with a fresh batch. If the milk is too hot or not warm enough then the yeast will not activate.

Step 2:
In another bowl add the beaten egg, garlic powder, salt, Parmesan cheese (if using) and seasoning.

Step 3:
In a large bowl add the flour. Make a well in the center and pour in the yeast mixture and the egg mixture. Use your hands to make a dough.It will be a little sticky. Just make sure all the ingredients are evenly incorporated. Oil the insides of the bowl and place the dough. Cover with a cling or a tea towel and let it raise / double the size for 1.5 - 2 hrs. Meanwhile grease a 9 inch round pan with melted butter / olive oil. Cut the mozzarella into 12 cubes and shred the cheddar and remaining mozzarella

Step 4:
Once the dough has doubled punch it down and knead for 5 mins. Then divide the dough into 12 equal balls. Take one dough ball slightly flatten it in your palms and place a mozzarella cube and roll it into a ball. Do the same for remaining dough balls. 

Step 5:
Now place the balls inside the greased pan and stuff shredded cheese in between each balls and simply wherever you want. Let the dough raise for another 30 - 45 mins. And meanwhile preheat the oven to 180 degrees Celsius and prepare the baste by mixing together the butter, parsley and garlic powder.

Step 6:
Once the dough has raised again. Brush the top generously with the flavored butter and sprinkle some more any left over cheese if you want. 


Bake in the preheated oven for 30 - 35 mins until the top is golden brown and the cheese is a bubbly. 

Serve hot immediately straight out of the oven with a final brushing of flavored butter! 

Happy Baking! 
0

Sunday, 14 December 2014

Ah I love my granny's cooking. There are few recipes of her's which I love and one of them is her FISH FRY! Its just salt, chili powder, turmeric and lemon....easy peasy lemon squeezy! And I prefer tava frying the fish rather than deep frying them, thats another version of my mum's! Now about the chili powder used, we always always use Homemade Chili Powder. Never the Kashmiri ones. Because the home made chili powder is less hot and it gives a lot of masala which when fried with fish is super tasty. The kashmiri ones are hot hence you can use them in excess thus giving you no masala. But its not mandatory to the homemade chili powder. I have used Seer fish / king fish / vanjaram meen for this but you can use any type of fish actually. 


And I don't have a pic of beautifully presenting one large slice of fried fish with pickled onions and a wedge of lemon on the side. Oh hell with it I was already salivating and who needs a final picture! 
My granny's Fish fry coming straight from the frying pan!!!

My granny massaging the fish with masala


You Will Need:

A kilo of Thinly Sliced fish, Cleaned and pat dry
Oil required for shallow frying
For the Marination:
1/4 tsp of turmeric powder
2 heaped Tbsp of Homemade Chili Powder (Adjust according to your spice requirement)
Juice from 1 Lime
Salt to Taste

The Cooking:

Mix together all the ingredients for marination. Rub the marinade evenly over all fish slices. Let them marinate for an hour at least. Heat oil for shallow frying on medium. Once hot place 2 slices at a time and gently shallow fry giving 2- 3 mins per side. Fish cook faster hence frying them long will make them tough.

Serve with a squirt of lime juice!

Note: There will be a sediment of masala in the bottom of the frying pan after you fry each batch. Do not throw away the masala. Serve them along with the fish fry.

Happy Cooking!

1

Saturday, 13 December 2014

I love fries, but who wouldn't! We must have seen crisp fries in lot of chip shops and wondered how they achieve that crunchy on the outside and soft on the inside texture. Homemade fries are always soggy. Well if your's is not then well congratulations! So I bring you THE PERFECT FRIES you can make at home. Long time back I remember watching Heston Blumenthal's Cook like Heston on Tlc. Wow that's an amazing program I tell you. The guy is a genius! He cooks like he is in a science lab. So methodological and very accurate. And he made this TRIPLE COOKED CHIP on one of the shows and since then its been on my long list of "Recipes to try before you die". Hmm actually that list is getting endless! 


So, you cook the potato three times to achieve that crisp outside. Well its quite a ling process but actually easy and you can make a batch of it and stick it in the freezer and deep fry when you have guests around. According to Heston you will need a kitchen thermometer.But I don't own one and the chip turned out absolutely fine. Just make sure you use long variety potato for this like shown in the pic below. 

Stock Image

You Will Need:

1 kg Potatoes, Peeled and cut into chips (2cm x 2cm x 6cm)
Oil to Deep Fry
Salt to Season

The Cooking:

Step 1:
Place the cut chips into a bowl and wash under running water till the water runs clear. 

Step 2:
Place 2 ltrs of room temperature water in a large saucepan and add the cut chips. Place on medium heat and simmer untill the chips are falling apart (they will be cooked through but still hold the shape) approx 30 mins depending on the potatoes. 

Step 3:
Drain the potatoes carefully and place them on a tray to dry out. Then stick the tray into the freezer for 1 hr.

Step 4:
Pour oil in a deep frying vessel and heat the oil to 130 degrees. If you do not have a kitchen thermometer its fine. To check if the oil is heated to 130 degrees simply put a potato chip in it. The chip will sink to the bottom and you can see teeny tiny bubbles appearing from the drowned chip. Fry them in small batches for 5 mins apprx until there is a outer crust formed.

NOTE: No Need to defrost the chip. It must be frozen while deep frying

Step 5:
Remove from the oil and place them in a kitchen paper to absorb excess oil. Put the potatoes on to a tray and freeze for another 1 hr.

NOTE: If you dont want to cook the chips immediately then it can be kept in the fridge for 3 days

Step 6:
After an hr take the chip out and heat the oil to 180 degrees (To check put a chip into the oil and it immediately sizzles like crazy). Deep fry the chips in batches until the chip is crisp and a nice golden brown colour approx 7 mins. Place them on a kitchen paper and season with salt.

There You have the perfect chip you can ever make. So crunchy on the outside and soft on the inside.

I suggest you serve it immediately.....1

Happy Cooking!  


0

Monday, 1 December 2014

The other day my daddy bought these fresh prawns and usually we do a spicy curry, Fry, spicy grilled prawns with it to accompany rice / roti. But prawns taste amazing when made with just few ingredients. Prawns and garlic are best friends. They create amazing flavors with let to play. This dish has some fresh flavors and are made in no time. Make it more special with a final drizzle of Extra Virgin Olive Oil and serve with a crusty bread. 


You Will Need:

500g Prawns, Cleaning with tails intact and divined
5 Large Cloves of garlic, Grated / Very Finely Chopped
Little Ginger, Grated
Juice from Half a Lemon
1 tsp of Red Chilli Flakes
Some Freshly Chopped Coriander Leaves / Parsley 
Salt to taste
3 - 4 tbsp of Olive oil / Butter 

The Cooking:

Heat oil / butter on a non stick pan. Once hot add the garlic and ginger. Saute on medium heat for few mins making sure not to brown the garlic. Add the chilli flakes and saute for a min. Then tumble in the prawns, add the lemon juice and season with salt. Cook on high till the prawns are pink and cooked through. Prawns cook quick so just few mins on high will do. Finally sprinkle chopped coriander / parsley and serve hot.

Happy Cooking!
0

This is the first time I introduced fish to little A and he simply loved it. Marinating the fish keeps it soft and its easy to chew for even toothless. And my 3 yr old niece too loved it dipped in ketchup. If you have any fish / seafood allergies in your family history wait till the baby turns 1 year. While introducing any new food, offer the food for 2 - 3 days and watch for any allergic reactions or change in baby's activity. Always introduce one new food at a time. 

There is an adult version to this fish nuggets which I will be posting later.


You Will Need:

To Marinate:
Some firm fish fillets (make sure there are absolutely no bones)
Some lime juice, Replacing Salt
Some freshly cracked black pepper
Some thyme
A clove of Garlic, Grated

*Avoid, salt and sugar before 1 year

Other Ingredients:

Breadcrumbs (I always prefer homemade, thrown in torn stale bread into a food processor / mixer and pulse till coarsely ground)
1 Beaten egg
Oil to Shallow Fry

The Cooking:

Marinate all the ingredients under To Marinate in a bow for an hour.

Place the breadcrumbs on a plate. Place the beaten egg on to another bowl. Meanwhile heat oil on low.

Take a fish fillet and dip into the egg and roll over the breadcrumbs. Gently press the breadcrumbs on to the fish and shake off the excess. Repeat for all the fillets and let them rest for few mins. Shallow fry till they turn a deep golden brown colour. Breadcrumbs brown quicker so be careful not to let it fry for too long.

Squeeze over lemon juice and serve your baby / toddler.Optionally you can use yogurt as a dip for baby and mayo for toddler. 

Happy Baby Led Weaning!


1

Monday, 24 November 2014

This is a mandatory post. As Little A is growing by leaps and bounds its so hectic right now that am trying to squeeze cooking between his so unpredictable naps. And I literally just gave up blogging! But thank god I have a pushy hubby and Big A has been nudging me to keep the foodie and blogger in my alive! So am sorry I have been ignoring my blog for long and the poor photographs that may follow. Because when I shot this pic Little A almost pulled the plate down :D 

So, PANEER BHURJI / scrambled cottage cheese is such a quick fix. Its super tasty and you could also make this as a paratha stuffing, sandwiched between bread slices or simply spread over a dosa....Little A too loved this when I stuffed this in a paratha and smeared it with ghee, of course dont add chilli and salt if you are planning on offering this to your baby. 


Serves 3
You Will Need:
200g of Crumbled / Coarsely Grated (NOT FINELY) Paneer / Cottage Cheese, I used Homemade
1/2 tsp of Cumin Seeds
1 Medium Onion, Finely Chopped
1/2 Red Bell Pepper, Finely Chopped (Totally Optional)
1/2 tsp of Ginger Garlic Paste
1 Large Tomato, Finely Chopped
1 Green Chilli, Finely Chopped
1/4 tsp of Tumeric Powder
1/4 tsp Gram Masala
1/4 tsp Red Chilli Powder
1/4 tsp Coriander Powder
1 tsp of Kasuri Methi, Crushed between your palms
Salt to taste
2 tbsp of Oil
Some Chopped Coriander Leaves  

The Cooking:

Heat oil in a non - stick pan. Once hot crackle cumin seeds and add the chopped green chillies. Then add the onions and saute till pink and translucent followed by ginger garlic paste. Saute on medium for 2 mins and add the tomatoes when the onions are golden brown. Add the red bell pepper and saute for a min. Now add the salt, red chilli powder, coriander powder, garam masala and kasuri methi. Saute for 4 - 5 mins till the raw flavours are gone. 

Now tumble in the grated / crumbled paneer and mix well. Add the chopped coriander leaves and cook on medium heat for 2 mins or till the paneer is well mixed with the gravy and become soft. Take off heat and serve hot with roti / rice!

Happy Cooking! 

0

Monday, 13 October 2014

Amma's Recipe #21

Should I really tell you how delicious and mouth watering this dish is? You should see my keyboard when I was making this post. Drools!!! Its quick, simple and irresistible. Perfect as a side to rasam or with any curry and a fab appetizer.


You Will Need:

A kilo of Prawns, Washed and Deveined 
1 tsp Red Chilli Powder
1/2 tsp Turmeric Powder
2 tsp Ginger Garlic Paste
1 Whole Egg
Juice of a Lime
2 tbsp Cornflour
1 tbsp Rice Flour
Salt to Taste
Few Curry Leaves

The Cooking:

Mix all the ingredients together in a bowl and marinate for an hour at least.

Heat oil in a heavy bottom kadai and add the marinated prawns once the oil is hot. Prawns cook quickly so take them out after a few mins once the masala is cooked. Leaving them for long will make them hard. 

Place them on kitchen paper to absorb excess oil and serve with lime wedges.

Happy Cooking! 

0

Saturday, 16 August 2014

Remember my mom's Cauliflower Masala Fry, one of the most popular recipes on the blog? I said you can never find it anywhere at any hotels. And this recipe is something you cannot guess (exactly) unless I tell you what it is! And this recipe is my grandma's and she has been keeping this under lock and key. Even my mom does not make this often, its my granny who prepares this all the time. No one else in our entire family can make it like her. You can never find this dish else where. But if you do, am all ears!

KARI MUTTAI CHOPS....Mutton Chops is a spicy curry and the chops is actually hidden inside the eggs. See I told you, you can't guess unless I tell you what it is. Its a family favourite. You got to try this I tell you, and wow your family or play guessing game with the guest! 


You Will Need:
1 Kg Mutton, Boneless
4 eggs Per 250g of Mutton 
1 Small Onion, Finely Chopped
1 Small Tomato, Finely Chopped
1/2 tsp Turmeric Powder
2 - 3 tbsp Oil
Salt to taste

For the Chops Masala:
100g Peppercorns
50g Cumin Seeds
1 tbsp Fennel Seeds
2 inch Ginger 
8 Garlic Cloves
Some Curry Leaves
Some Coriander Leaves
6 Green Chillies
4 Cloves
1 Cinnamon

The Cooking:

Step 1:
Place all the ingredients for the chops masala and grind them to a paste. It should be smooth and at the same time not very coarse. 


Step 2:
Clean the mutton and place it in a bowl and smear it with the prepared masala. Make sure you massage the mutton well and that the masala is fully coated. Let this rest for an hour at least.


Step 3:
Heat a pressure cooker with oil and add the chopped onions. Once they are translucent add the chopped tomatoes and saute for a 2 - 3 mins. 


Now tumble in the marinated mutton, 1/2 tsp turmeric powder, required salt and give it a quick stir. Water is not required to cook the meat since it will cook in its own juices and chops masala. But if you find the water content its too low then sprinkle some but not much. 


Pressure cook for 4-5 whistles or until the meat is done. 


Step 4:
The chops will be little runny. So transfer it to a kadai and simmer till it dries up.


Step 5:
Break eggs into a large bowl and add required salt. Whisk. Add couple of ladles of chops with the mutton pieces into the beaten eggs. If the eggs are in excess you can make a spicy omelet out of it. So don't stress about the mutton to eggs ratio. 


Step 6:
Heat a heavy bottom kadai. DO NOT use flat base ones, the bottom should be curved. Scoop the egg along with a piece of mutton and place in oiled kadai. The kadai must be really hot. It only needs fews seconds of cooking. Now its not tricky, just roll the edges with a spatula couple of times so that the eggs seal the chops. If you see a tear and chops peeking out, then just pour a little beaten egg on it. 


Happy Cooking!
0

Friday, 25 July 2014

Amma's Recipe #15

I honestly tell you I don't like liver. But I didn't want to miss out this recipe of mu mum's since I know many of you likes liver. I like the dry masala though but not the liver. Its spicy and peppery in flavour. A classic Tamil Nadu style preparation. Enjoy with hot steamed rice. 


You Will Need:

250g Liver, Cut into small pieces

1 large Shallots, Finely Chopped
1/2 tsp Ginger Garlic Paste
1/4 tsp Turmeric Powder
1 tsp pepper Powder
1 tsp Cumin Powder
1/2 tsp fennel seeds
Few Curry Leaves
Salt to taste
5 tbsp Gingelly Oil

The Cooking:


Heat oil in a kadai on high and crackle fennel seeds. Then add the chopped shallots and cook till they are golden brown. Now add the ginger garlic paste and cook for a min till the raw flavours of the ginger garlic paste goes off. Then tumble in the liver and sprinkle required salt and little water. 


Liver cooks fast, gently mix them and cook covered for 8 - 10 mins. Once the liver is cooked sprinkle pepper powder, cumin powder and curry leaves. Simmer for another min or so till the gravy is dry and oil separates from the sides. 


Note: When adding curry leaves to any dishes, just tear them. This helps in bringing out the flavours more. 


Happy Cooking!

0

Thursday, 24 July 2014

This is NOT KFC and its not Southern Fried Chicken, Its BUTTERMILK FRIED CHICKEN WINGS! What's the difference??? Both KFC and Southern Fried Chicken DOES NOT use buttermilk and they both use Hot Sauce. I have tried making KFC at home a lot of times before but I always seemed to get the texture wrong. And when I tried this Buttermilk fried chicken, I loved its flavour more than the KFC. And I found the trick to get that flaky, crisp crust. 


The ziplock method easier and less messy. Nigella does that all the time, doesn't she? And it also helps in forming the crust. When I coat the chicken with my hands in the flour, it almost shapes the crust. Somehow! But when I tossed it in the ziplock, I got the desired crust and no extra wash ups. I have double coated the chicken to get that extra crunchy crust. When single coated its little less in crunch and the chicken flavour is more prominent. So the choice is yours, double dipping or just single. 

Recipe Source: Food wishes

You Will Need:
Buttermilk Marination:
1.5 kg Chicken (I used wings without skin), Cut into 8 pieces
1 tsp Salt
1tsp White Pepper 
1 tsp Paprika
1/4 tsp Cayenne
1/2 tsp Black Pepper
1 tsp Ground Dried herbs (Thyme, Sage, Rosemary,Oregano)
2 Cups Buttermilk


For the Seasoned Flour:
2 cups Plain Flour
1/2 tsp Baking Soda (Optional)
1 tsp Salt
1/2 tsp paprika
1/4 tsp cayenne
1/2 tsp White pepper
1/2 tsp Garlic Powder
1/2 tsp Onion Powder

Peanut oil / Vegetable Oil for Deep Frying


The Cooking:

Step 1:
Wash and pat dry the chicken. In a ziplock bag, mix all the ingredients for the buttermilk mix. Add the chicken and massage and let it marinate overnight or 2 hrs min.

Note: You can substitute buttermilk by mixing 3/4 cup plain yogurt with 1/4 cup of milk.  Stir and make it a quick substitution for buttermilk.

Step 2:
In another ziplock bag, mix all the ingredients for the seasoned flour. Give it a good mix.

Step 3:
Heat oil in a heavy bottom vessel.

Step 4:
Take the chicken out one piece at a time and place them into the seasoned flour. Once all the pieces are into the flour, lock the bag and just toss it so the chicken gets coated with the flour. 

Step 5:
Carefully shake off the excess flour from the chicken and again dip them into the buttermilk, followed but another toss in the seasoned flour. So that becomes the double coating for the chicken. 

Step 6:
Shake off the excess flour and drop them one at a time into the hot oil.

Note: Oil SHOULD NOT be smoking hot. Enough to sizzle instantly. Too hot oil will cook and brown the coating and leave the inside RAW!

Use thongs to turn over the chicken pieces. Fry on medium heat till the chicken is crunchy and golden brown outside. Remove and place on kitchen paper to observe excess oil. 

Serve hot with ketchup or mayo!

Happy Cooking!


0

Author

Search this blog