Showing posts with label Guilt Free Indulgence. Show all posts

Thursday, 12 March 2015

Cutlets brings back my school memories. I remember my mom making it for my after school snack and the smell of cutlets frying would hit me as soon as I enter the house. Her's are the best I have ever tasted. And cutlets were the only way she made me eat beets and french beans. Its been years since she made it again. And now I made them for Little A. And what an hit it was. Not only Little A loves it but his dad too. 
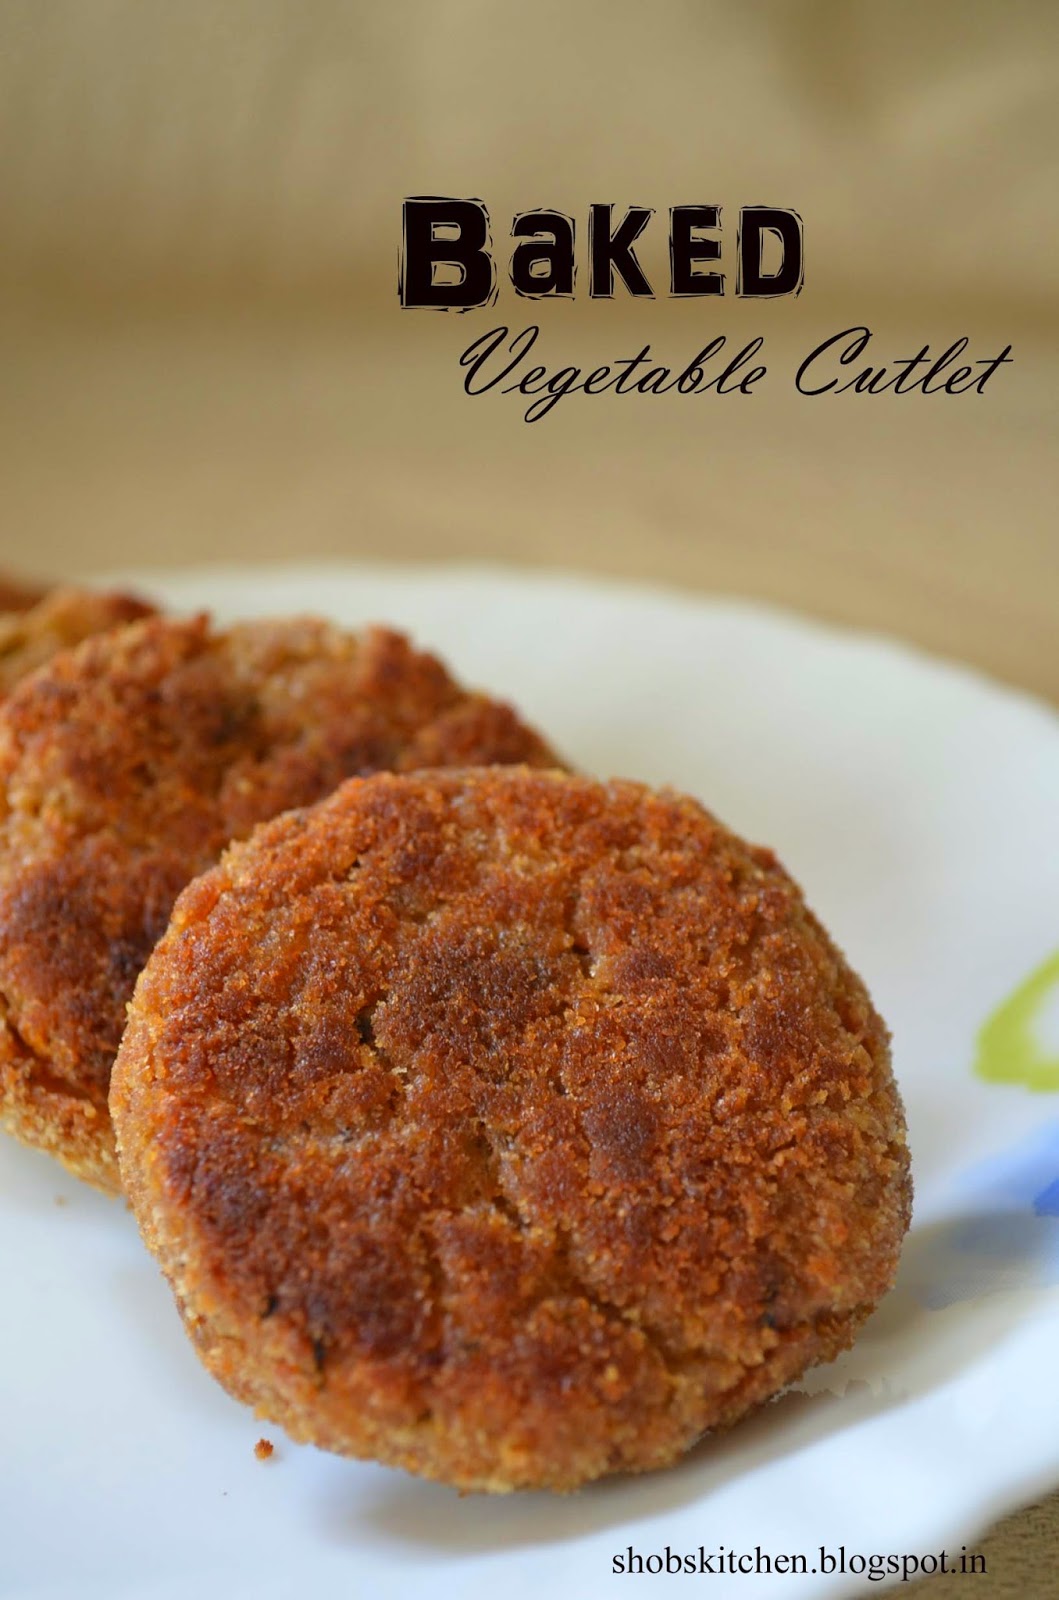


Cutlets are basically veggie patties that are shaped and crumb coated to deep fry. But I baked them.Cutlets are actually a healthy snack. Why deep fry them and make them unhealthy? And baking is much more easier and there is no compromise on the crisp outside. There is one small trick to get crisp outside when baking cutlets and I will be telling you that later in the post.


I was so happy when I made these. It bought back a lot of old memories. Little A could not wait to eat these straight from the oven. He kept walking (Yes, he has just begun to walk unsupported) into the kitchen; asking me to lift him and he kept pointing the oven demanding he wanted one right now. 

You Will Need:
4 Medium Sized Potatoes, Peeled, Cooked till Soft & mashed
1 Medium Sized Onion, Finely Chopped
1/2 tsp of Ginger Garlic Paste
1 Large Tomato, Finely Chopped
1 Large Carrot, Finely Chopped
6 French Beans, Finely Chopped
1/4 Cup of Cooked Peas
1 Small Beetroot, Finely Chopped
A tbsp of Finely Chopped Parsley / Coriander Leaves

***All the veggies can either be steamed beforehand or sauteed in the masala to cook. I prefer sauteing them.

Other Ingredients:
1/2 tsp Garam Masala
1/2 tsp of Cumin Powder
Salt to Taste
Some Freshly Cracked Pepper
Some vegetable Oil 
2 Cups of Plain Breadcrumbs, Homemade / Store-bought 
2 tbsp of Corn flour / flour 

The Cooking:
Step 1:
Making the Filling:
Heat a non - stick pan on High and add 2 tbsps of oil. Once hot add the onions and saute till pink and translucent. Then add the ginger garlic paste and saute for 2 mins. The onions SHOULD NOT BROWN. They just have to be soft and translucent. Then add the tomatoes and saute for 2 mins on high. Now add the salt, black pepper, garam masala and cumin powder. Saute for a min or so till the spices are cooked. Then tumble in the finely chopped carrots, beans & beets. Mix well and add little water and cover to cook the veggies. Since they are finely chopped they cook quickly with very less water. After 5 mins give a good stir and cook till any excess water has Vaporized. 

Now add the peas and chopped parsley. Mix well. The veggies should be dry at this stage. Add the mashed potato and mix well until the vegetables are well combined with the potatoes. At this point sprinkle over 2 tbsp of breadcrumbs. They absorb any excess water if any. Mix well on low heat and check seasoning. Take off heat and let it cool.

Step 2:
Make the slurry: 
You can either use one beaten egg or cornflour slurry to roll the cutlets. To make the slurry just place the flour on a shallow plate / bowl and add little water to make a thin paste. The slurry should not be runny but little thin. Keep aside.

Step 3:
Making the Cutlets:
Once the filling is cool enough to handle made balls out of them and mold to a cutlet shape. You can even use an oiled cookie cutter to make different shapes. 

Place the breadcrumbs in a plate. Take a cutlet and dip it in the slurry prepared earlier. Then roll them over the breadcrumbs. Pat the breadcrumbs well into the cutlet and shake off the excess. Repeat this for the entire batch. At this point you can either straight away bake them or refrigerate them for later. To freeze just place them in ziploc and freeze. 

Step 4:
Baking the Cutlets:
Preheat oven to 200 degree celcius 
Take a baking tray and line with foil. Brush oil over the foil. Now place the cutlets an inch apart and brush them throughly top, bottom and sides of the cutlet with oil. This is the key for getting crisp cutlets. You don't have to generously brush them with oil but just so they coat well. 

Place it in the hot oven for 35 - 40 mins flipping them over half way through. Once they are golden brown take them off and serve with tomato ketchup!

Happy Cooking!


0

Friday, 6 March 2015

Recently I have been on the lookout for healthy bakes for Little A. Since eating anything without offering him is impossible I take along some healthy snack for him during travel for him to munch on. Though these muffins are made with whole wheat flour and has less sugar I would limit this as a treat for babies. But for adults these are perfect if you want some yummy healthy snack on the go.  They are so moist and fluffy and amazingly easy to whip up and bake.


Makes a Dozen

You Will Need:

2.5 Cups of Whole Wheat Flour
1/3 Cup of Light Brown Sugar
1/3 Cup of Vegetable oil
1 tsp Baking Powder
1 tsp Baking Soda
1 tsp Vanilla Extract
A Pinch of Ground Cinnamon
1 Large Egg
1.5 Cups of Finely Chopped Apples with Skin
1 Cup of Buttermilk***
A Generous Pinch of Salt

Muffin Topping (Optional, I simply skipped):
Cinnamon
Sugar
Melted Butter

The Baking:

Preheat oven to 180 Degree Celcius and grease a muffin pan.
In a large bowl pour in the oil, buttermilk, brown sugar, vanilla and egg. Whisk this till smooth using a hand blender / wire whisk. In another bowl sift in whole wheat flour, baking powder, baking soda, salt and cinnamon. Now simply add the dry ingredients into the wet ingredients and mix until just combined. 

NOTE: This is a very thick batter almost like a dough. But DO NOT OVERMIX or add excess liquid. If overmixed or batter made a little thin the muffins will turn out dense and hard.

Finally fold in the apples and spoon into the greased muffin tin using a table spoon or an ice cream scoop (this works best for me). Fill the muffin batter all the way to the top so that they raise high. Now if you are making the muffin topping, generously spoon over each muffin and bake in a preheated oven for 15 mins or until a cake tester inserted in the middle comes out clean and the top is crunchy.

***Substitution for Buttermilk.
Take 1 cup of milk and add a tbsp of vinigar / lime juice. Let it for rest for 10 mins before using in the recipe.
OR
Take ¾ cup of milk and stir in ¼ cup of yogurt. Mix and use in the recipe.


Happy Baking!
0

Tuesday, 30 December 2014

After Little A started on solids, I have been hunting for a lot of quick and healthy recipes. Specially snacks and quick bites to be in particular. A always loved snatching biscuits from his cousin sis. And since store bought biscuits are not healthy for babies I was searching for some healthy cookie recipes. Was a little unsure in the beginning when I saw this 2 INGREDIENT COOKIE. Yeah you heard me right 2 ingredients. Hence I made a very small test batch of just 5 cookies. Well later I wished I had baked more. 


You need just 2 ingredients to make this cookie and you can add any add on to it. Like nuts, currents, choco chips etc. I made 3 with just the 2 ingredients and added some chopped chocolate on Big A's batch. The cookies were really good and Little A just relished it. He began asking for more pointing at the oven. So easy to make and the healthiest breakfast cookie you can ever have. 


Recipe Makes a Dozen


You Will Need:
2 large overly ripe bananas, mashed 
1 Cup of Oats, Regular / Instant anything

The Baking:
Preheat oven to 180 degrees and line a baking tray with parchment paper / foil. 
Place the mashed banana and oats in a bowl. Mix well until combined. Divide the mix equally into 12 portion and place them on the baking tray and press down. The cookie won't spread when baking you can make it as thicker or as thinner you want. Bake in the preheated oven for 15 - 20 mins. Once done remove and cool on a cooling rack. Once cooled store in air tight container. 

NOTE: The sweetness comes from the bananas. So its best you use a very very ripe banana. Those with blackened skin is what i used. And frozen and thawed banana too works perfect. 

CLICK HERE TO CHECKOUT MY EVENT + GIVEAWAY ON THE BLOG 

Happy Baking!  
0

Monday, 15 December 2014

Pardon my terrible picture. It was close to midnight and I was in the middle of packing to travel the next day. Little A has been self feeding for the past 3 months now and its impossible to sneak a snack in front of him without him crying and asking for it. We had to train travel to our hometown the next day and I wanted to make some snack to carry with us so that we can have our train meals in peace. I polish off my fridge before every travel and I had nothing to make except couple of apples and some carrots. After Googling for what looked like an eternity I came across this Eggless Butterless Whole wheat carrot Muffins.....and I simply call them SKINNY CARROT MUFFINS!


I have never baked eggless before. I love my eggs. And am a fan of white flour. But since it was for Little A I had to go with Whole Wheat. There is ZERO Fat in these muffins and I was amazed at how moist it turned out. The snack was meant for Little A but since it was Eggless and Fatless Big A jumped right in. Healthy muffin baked in no time.  

Baking powder and baking soda are generally to be avoided for babies and toddlers but as a on off thing its fine. 

You Will Need:
Makes 12
1.5 Cups Whole Wheat Flour
3/4 tsp Baking Soda
2 tsp Baking Powder
1/2 tsp salt
1/2 tsp Ground Cinnamon
1/4 tsp Ground Clove
1/4 tsp Ground Nutmeg
1/2 Cup White / Brown Sugar
1.5 Cups Unsweetened Applesauce
1 tsp Vanilla Extract
1 Large Carrot, Peeled and finely grated

The Baking:

Preheat oven to 180 degrees and line a muffin tray with cupcake liners or just grease them or spray cooking oil.

In a large bowl sift in the flour, baking soda, baking powder, salt, ground cinnamon, ground clove, and  ground nutmeg. Then add the sugar, applesauce, vanilla and shredded carrots. Mix until everything is moistened. DO NOT over mix.

Fill each muffin cup 3/4th full and bake for 18 - 25 mins or until toothpick inserted in the center comes out clean. Allow the muffins to cool in the muffin pan for 10 mins before turning them over to a cooling rack to cool further. 

Recipe Source: Simply Daily Recipes

Happy Baking!
0

Saturday, 13 December 2014

I fell in love with this one! Egg toasts are my favorite breakfasts but I have no idea why I did not spice it up all these years. The flavors were just amazing and the aroma was just wafting through the house when I made those. I used a whole grain bread, you can use any bread you like. 

To make this baby / toddler friendly, I suggest you omit the salt (Substitute with lime juice) and green chilies. 


You Will Need:

4 Whole Wheat Bread Slices
2 Large Eggs, Beaten
1 tbsp Finely Grated Carrot (Optional)
Couple Of Shallots / Spring Onions, Finely Chopped
1 Small Tomato, Chopped
Some Chopped Coriander Leaves
1 Green Chili, Finely Chopped
A pinch of Turmeric Powder
1/2 tsp of Garam Masala
1/2 tsp Chaat Masala (Can also sub with salt)
1/4 tsp Cumin Powder
1. 5 tsp of Thick Yogurt (Weird ah) / Double Cream 
Butter / Ghee for toasting

The Cooking:

Heat a Non stick pan on medium with butter / ghee.

Mix all the ingredients into the beaten eggs and beat well. Dip both sides of a bread slice and place it on the hot pan. Scoop out little onions and tomatoes from the beaten egg and spread them on top (since they will be in the bottom the bread wont pick up much onions and tomatoes)

When one side is done flip to the other side and cook for couple of mins. Serve hot!!!

Happy Cooking!
0

Monday, 9 June 2014

LIME HONEY OATS MUFFINS....these muffins are a weight watchers indulgence. If you are a buttery sweet kind of person, then sorry this won't give you any satisfaction. I am no fan of oats or any healthy dish for that matter. I actually made these for my big bro (he is the one I experiment all my recipes with, poor fellow ;p )


These muffins are very light, less sweet and "The go to" breakfast on the go. Its moist and the texture is just amazing. You can taste the oats, the honey and ting of lime in every bite. The glaze gives a nice sharp edge to the muffins, so I recommand you be genourous when glazing. 


Before the glaze! 

There is another way you can eat these muffin. Slice through the muffin and spread your favourite jam and eat like scones, Yummm!

Recipe Courtesy: food.com

You Will Need:
Makes 13 Muffins

For the Muffins:
1 Cup Uncooked Oats
1 Cup Yogurt
1/2 Cup Honey
1/4 Cup Milk
3 tbsp Melted Unsalted Butter
2 tsp Lime Zest
1 1/2 Cups Plain Flour
2 tsp Baking Powder
1/2 Tsp Baking Soda
1/4 tsp Salt
2 Egg Whites, Lightly Beaten

Glaze:
You Will Need:
3/4 Cup of Powdered Sugar
4 tsp Lime Juice
1 tsp Lime Zest

The Baking:

Muffins:
Preheat oven to 180c and Line the baking tray with 12 muffin cups.

Combine oats, yogurt, honey, milk, melted butter and lime zest in a large bowl. Mix evenly and let it rest for 10 mins.

In another bowl, sift together flour, baking powder, baking soda and salt. Keep aside until needed.

Add the beaten egg whites to the oats mixture and mix until well combined. Fold in the dry ingredients into the oats batter until the flour is moistened. DO NOT OVER MIX.

Fill the muffin cups almost full. Bake for 20 - 25 mins until the muffins are cooked through and are light golden colour on top.

Let it cool in the tray for fe mins. Then take the muffins out and let them cool completely on a wire rack.

For the Glaze:
Combine all the ingredients together.

Dip the top of cooled muffins into the glaze and serve.

Like ShobsKitchen On FaceBook

Happy Baking!


0

Monday, 11 November 2013

BANANA CINNAMON SMOOTHIE is the simplest of all breakfasts on the go. Its healthy, delicious and packed with all nutrients to keep you going. This smoothie is packed with protein, vitamins, folic acid, calcium, dietary fibers and magnesium. Its such a quick fix when you don't have time to grab a bite and this makes a wonderful snack for pregnant women in fighting fatigue. 


I always use frozen banana and cold milk. What this does is it makes the smoothie super super thick!  

You Will Need:

1 Tall Glass of Milk
1 Ripe Banana
Pinch or Two Cinnamon Powder
1/2 tsp of Vanilla Extract
2 Tbsp of Sugar / Honey

The Cooking:

Add all the ingredients to a blender and blend till smooth and Enjoy!
Happy Cooking!
0

Monday, 10 June 2013

Don’t they look like crumbled chocolate cake?! Again there are a very few health food I love to munch on. Somehow healthy food and me never go hand in hand. But this RAGI PUTTU is actually my favourite & I can eat this a day long.  Its really easy to prepare and tastes so good. Ragi digest slowly, so they keep you stuffed for a longer time cutting on excess munching. If you want lose those extra lbs, then ragi is your best friend.


Finger Millet / Ragi is a highly nutritious food grain rich in calcium, protein, iron, fibre & ZERO cholesterol. You can read about the benefits of ragi HERE.

Serves 2

 You Will Need:

A Cup of Finger Millet / Ragi Powder
Little Warm Water to Mix
1/4 Cup of Freshly Grated Coconut
2 Cardamom Pods (Bruised) / 1/2 tsp of Cardamom Powder
A tbsp of Sugar, Optional (Little or More)

The Cooking:

Place the ragi powder in a bowl and sprinkle little water just to bring everything together. Take some ragi and press it hard in your palm. It should hold its shape but at the same time you should be able to crumble it. Press down the ragi and let it sit for 15 – 20 mins.

Line the idly pate with wet cloth and get your idly steamer ready heating with required water. Now when you touch the ragi it will look as though it has hardened and set. But it will still be crumbly. So take little ragi and crumble them in your palm directly on the idly plates, don’t crumble too fine. If you think it has harden too much, put it in a food processor and just pulse couple of times. Steam this for 10 mins or until the ragi is not sticky and crumbly.

Transfer to a bowl and sprinkle with grated coconut,  cardamom pods and sugar and serve.

IMPORTANT POINTERS:
  • DO NOT add too much water and turn it to a paste. If so, add little ragi powder.
  • Am not good in grating coconut. So I always pulse pieces of coconut in a food process or in a mixer for few secs. So if you are planning to grate coconut like me, then pulse the coconut along with the cardamom pods.
Happy Cooking!
1

Friday, 24 May 2013

Sundal is a simple, tasty, extremely healthy and a very popular snack in South India. We prepare this sundal as offerings in a lot occasions. Sundals are my husband’s favourites and they are our dinner on many nights. White Chickpeas are my favourite and this is something different from the usual sundal tempered with just mustard, urad dal, curry leaves, red chillies and grated coconut. Its spicy and very aromatic. I learned this recipe from my mom and she learned this from one of our family friends, its in her house we first tasted this spicy sundal. A nice refreshing twist to the usual boring ones.

Serves 2


You Will Need:

A cup of Chickpeas (White)
Salt to Taste

For the Masala:

2 tbsp of Freshly Grated Coconut
Tsp of Grated Ginger
1/2 tsp of Cumin Seeds
1 Green Chilli
A Handful of Chopped Coriander

Tempering:

A tbsp of Oil
1/2 tsp of Mustard Seeds
1/2 tsp of Urad Dal
Few Curry Leaves
Couple of Dried Red Chillies

The Cooking:

Soak the chickpeas for 8hrs or overnight and cook with salt until soft & tender. Drain water and keep aside.

In a mixer, coarsely grind all the ingredients for masala and keep aside.

Now, Crackle the mustard seeds, urad dal, curry leaves and red chilli in hot oil. Add the masala and salt to the tempering and sauté on low heat for a min or so. Tumble in the chickpeas and toss well so that the chickpeas are well coated with the coriander masala. Check for seasoning and take off heat after a min.

Important Pointers:
  • Do not add water to the masala. You want to be dry and coarse not chutney or paste like.
  • Keep the flame low when sautéing the masala, too much heat will make the masala go dry and crisp.

Happy Cooking!
0

Friday, 10 May 2013

This is one of my most favourite comfort food. There are so many variations in khichdi, everyone have there own version of this. Khichdi is a south Asian preparation made with rice, lentils, vegetables and even with prawns in the coastal Maharashtra. Samba rava or Dalia is broken wheat rava is a wonderful cereal, a good source of a dietary fiber. One of the best foods for weight loss as its low in calorie & low fat protein, preventing heart disease, high blood pressure, high sugar levels etc. There are a very few healthy foods I love to eat and this Khichdi is one. I always make this in a pressure cooker, it makes it easy and quick.

Leave out the salt and chili to make this Baby / toddler friendly recipe!

Serves 2


You Will Need:

A Cup of Samba Rava
1 3/4 cup of Water
2 Cinnamon Sticks
1 Bay Leaf
1 Large Onion, sliced
1 Large Tomato, chopped
A tbsp of Yogurt
A tbsp of Coriander, Finely Chopped
A tbsp of Mint, Finely Chopped
3 Slit Green Chillies
1 Large Carrot, chopped or cubed
1/4 Cup of Chopped Green Beans
1/4 Cup of Uncooked Peas
Salt to Taste
2 tbsp of Oil / Ghee

The Cooking:

Heat oil in the pressure cooker and add bay leaves, cinnamon, onion and chillies. Sauté till the onions are translucent and tip in the tomato, yogurt, coriander and mint. Sauté for a min and add the vegetables. Stir well with salt. Now add the rava and stir till its all mixed with the vegetables. Pour in the water and place the lid on. Cook on high till it gives one sound, then turn the flame down and let it cook for 10 mins. Take off heat and wait till the pressure releases on its own.

Serve hot it onion cucumber raita.

IMPORTANT POINTERS:
  • You can also add uncooked cauliflower and cubed potatoes to the khichdi.
  • If you are not familiar with cooking in pressure cooker, remember not to try open the cooker with the steam still in. The steam needs to release on its own, it would take about 5 mins. You you release the pressure and open before that the khichdi will be watery.
Happy Cooking!
0

Thursday, 9 May 2013

For me, a food being unhealthy is not an excuse to not eat that food. I always try to make it as healthy as possible. This “Lean” Taco Salad is totally fat free and packed with nutrients. How??! First, The chips are made from whole wheat that are baked with absolutely ‘No Oil’. Second of all, the soya bean chilli (Not Canned Beans Not Ground Meat). Soy beans are so good for you. They are rich in protein, iron, omega – 3 fats, fibre and are low in cal. To me the dressing is what gives a whole dimension to this dish. So dressing is a must. But a lean taco salad is only lean if it has a low cal dressing. Of course mayo and ranch are delicious,  but are heavy at for your waistline too. So I chose to made this salad dressing with thick low fat curd / Yogurt. Now don’t you agree its “Lean”? I kept the topping very simple, but you can top the salad with olives, pickles, avocado etc etc

The famous Mexican finger food made healthy & DELICIOUS !!!

Serves 3


You Will Need:

Some Torn Ice Berg Lettuce (I cut it into very thin strips)
As much as Whole Wheat Chips / Corn Tortilla Chips (Store Bought) You Want

For the Salsa:

2 tbsp Finely Chopped Onion
2 tbsp Finely Chopped Zucchini
1/2 Cup of Finely Chopped Red, Yellow and Green Bell Peppers
1/4 Cup of Sweet Corn Kernels
Salt to Season
A tbsp of lemon Juice

For the Chilli Kidney Beans:

A Cup of Cooked Soy Beans
A tbsp of Finely Chopped Onion
3 tbsp of Tomato paste
2 tbsp of Taco Seasoning (Adjust to your liking)
1 1/2 Cups of Soy Bean Stock (The water you boiled the soy in)
Salt if Required
A tbsp of Oil

Salad Dressing:

A cup of Low Fat Yogurt / Curd
1 tsp of Garlic Powder
1/2 tsp of Onion Powder
1 tsp of Lemon Juice
Salt & Pepper to Season
1 tsp of Dried Basil
1 tsp of Store Bought Green Chilli Sauce (I used this)
1/2 tsp of Sugar

The Cooking:

For the Dressing:

Mix all the ingredients and refrigerate.

For the Wheat Chips:

Whole Wheat chips are a healthier option. If you like you can use plain flour, half wheat and half plain flour or even store bought ones. You will find the direction for making the wheat chips here

For the Chilli Soy Bean:

Heat pan on high with a tbsp of oil, add the onions and sauté till translucent. Then tip in the cooked kidney beans, taco seasoning, tomato paste and stir everything together. Pour in the stock and simmer for 5 mins. Mash some of the beans and let others stay whole. Take off heat once the excess water has evaporated and it becomes a gravy. Add salt if required. Take off heat and let it cool.

For the Salsa:

Mix all the ingredients and season with salt and lemon.

Dressing Up the Salad:

Make a bed of torn lettuce leaf and place the chips on to. Tumble in the salsa and top off with chilli bean and place dollops of dressing . Crumble some chips on top and serve right away (you don't want the salad soggy)


IMPORTANT POINTERS:
  • If the yogurt you are using is not thick, place a cheese cloth over a sieve and tip in the yogurt into the cheese cloth. Let the excess liquid drip down and then you will have a thick and creamy yogurt. This is called hung curd.
  • If you don’t have garlic powder, grate a garlic cloves into the chilli bean and salad dressing.

Happy Cooking!
2

Sunday, 28 April 2013

OVEN BAKED POTATOES are my choice of sides to serve with my favourite baked chicken dishes. It so simple to make and takes in much much lesser oil than the fries. You can use any herb with this. Pizza seasoning, rosemary, thyme, dill just anything.

Serves 3

DSC04304

You Will Need:

4 Medium Sized Potatoes, Cut into Wedges
Baking Tray Line with Foil

Marinade:

A tbsp of Olive Oil / Oil
1/4 tsp Garlic Powder
1/4 tsp of Chilli Powder
Salt & Pepper to Season
A tsp of Dried Herbs

The Cooking:

Preheat the oven at 200 degrees.

Mix all the ingredients for marinade and keep aside.

Tip in the potato wedges into a pot of boiling water and cook for 5 mins. Drain completely. Place the wedges on the baking tray and with a pastry brush, apply the marinade on to the wedges evenly.

Pop it in the preheated oven and bake for 20 – 25 mins.

Serve hot.
Happy Cooking!
2

Thursday, 18 April 2013

Do you really want me to talk about this dish??? Nah, if you are not familiar with TANDOORI CHICKEN, then you must be living under a rock!!! For me it’s a family favourite and it’s best served with Coriander, Mint & Yogurt Dip. Recipe adapted from Chef Harpal Singh Soki….

20130414_132243

You Will Need:

800g – A kg (Not More) Whole Chicken (Skin on or Skinned)

Marinade 1

A tsp Chilli Powder
A tbsp Garlic Powder
Juice of  Lime
Salt to taste

Marinade 2

3/4 Cup of Hung Curd
(A cup of curd place on a muslin cloth and let to drain off excess liquid)
A tbsp of Ginger Garlic Paste
1 tsp Chilli Powder
1 tsp Garam Masala
1/2 tsp Black Salt
2 tbsp Mustard Oil
Salt to Taste
Butter for Brushing (OPTIONAL, I Always Skip this Process)

The Cooking:


Wash and clean the chicken. Pat it dry thoroughly with a kitchen towel. Make deep slits across the breast, thighs and fillets. What it does is, these slits will help penetration of the marinade and the chicken cooks through. Tie the tips of the drumsticks with butcher twine. Or you can do what I do. Make an insertion on the bottom of a drumstick tip, approx an inch in length. Now insert the other drumstick tip into this insertion. And that’s it.

Mix the chicken with marinade 1. Make sure you rub the spices all over the chicken, gently massaging them in the slits and inside the cavity.

In another bowl, mix together all the ingredients for marinade 2. Whisk this marinade well to form a nice paste. Pour the entire marinade over the chicken and rub it into all the slits and cavity. This needs to marinate for a good one hour at least. Prepare this well in advance, its good if you can give it 2 or 3 hours.
Preheat the oven at 200 degree.

I don’t place the chicken on cubed veggies and bake in the oven. This is what I do. Heat a pan with a tbsp of oil. Once hot, place the chicken back side down and let it brown. What it does is, when I roast the chicken in the oven, the back side of the chicken is not soggy. You don’t have to brown all the sides of the chicken, just the backside. Place this on a baking tray, greased with a tsp of oil. Place it in a preheated oven and cook for 40 – 45 min, brushing with butter once or twice.

Serve hot with Coriander & Mint Yogurt Dip, onions and lemon wedges.

IMPORTANT POINTERS:
  • The yogurt needs to be thick, so that the marinade is not thin and runny.
  • Give a good rub of the marinade into the slits and inside the cavity.
  • Marinating time is the key, it really needs to sit for a long time so that the spices penetrate the flesh and the chicken does not turn out bland.
  • Brushing with butter will keep the chicken tender.
  • If the outer skin is roasting too and turn brown, cover the chicken with foil and keep cooking.
  • Adjust the spices according to your taste.
  • Try to keep the bird within a kilo, too big will turn out hard. Small ones stay tender and cook easily.
Happy Cooking!
3

Tuesday, 26 March 2013

A simple bell pepper salad for all you pepper lovers…sweet and lemony and crunchy! Served perfectly with my MUSHROOM STUFFED CHICKEN BREASTS

Serves 3

DSC04181

You Will Need:

1 Red Bell Pepper, Sliced
1 Yellow Bell Pepper, Sliced
1 Green Bell Pepper, Sliced

Dressing:

3 tbsp Lemon Juice
Chopped Parsley & Mint
A tsp of Sugar
Salt & Pepper to Season
1 Garlic Clove, grated
Olive Oil (Optional)

The Cooking:

In a bowl, place the sliced bell pepper.

Mix all the ingredients for the dressing.

Now simply toss the bell peppers with the dressing and serve.
Happy Cooking!
5

Chicken and  mushrooms are a great marriage. This MUSHROOM STUFFED CHICKEN BREASTS is something I wanted to try for a very long time. Finally, they served a great dinner for us and my husband just loved it. The chicken was perfectly seasoned and the BELL PEPPER SALAD complimented well. The mushroom sauce with the left over mushroom stuffing was fantastic, sweet garlicky and so creamy. 

For preparing the chicken for stuffing, there are two ways in which you can do it. I made a pocket by slitting thick part in the top of the chicken breast and made space inside for the stuffing. But this can be a little tricky, because there are chances of you slitting the chicken way to much and the stuffing really not holding inside. Or this is the easiest, slit the length of the chicken breast and place the stuffing inside. Once done, take a butchers string and tie the bottom part and the top part of the chicken breast together.

DSC04185

You Will Need:

2 Firm Chicken Breast Fillets
Grated Cheddar / Swiss / Mozzarella
Extra Milk / Double Cream
Salt & Pepper to Season

For the Mushroom Stuffing:

200g Button Mushrooms, Sliced
A tsp of Garlic Powder
1/2 Red Bell Pepper, Finely Chopped
1 Medium Onion, Finely Chopped
Few Springs of Dill / Rosemary / Thyme
1/2 Cup of Whole Milk
Salt & Pepper to Season
A tbsp of Oil

The Cooking:

Heat a heavy bottom sauce pan on high and add the oil. Add the onions and bell pepper, and sauté for couple of mins. Then add the sliced mushrooms, garlic powder, salt and pepper. Sauté this on medium high. Now the mushroom will start to release a lot of moisture. let this cook for few mins and slowly add in the milk. Cook till the mushrooms are done and sprinkle the herbs and take off heat.

Season the fillet with salt and pepper. Now stuff the fillet with cheese and mushrooms. Heat a tsp of oil on a non – stick pan and sear the chicken breasts until they turn a nice golden colour. Then pop it in a preheated oven to finish the chicken cooking completely.
Definitely you will have the mushroom filling in excess. Pour the milk / double cream over the mushroom and cook on low heat till they thicken up.

To serve, slice the chicken breasts and serve with Bell Pepper Salad and the mushroom sauce.
Happy Cooking!
1

Tuesday, 19 March 2013

TOMATO BITES…I didn't know what else to call this. This was a by-product of my ROASTED TOMATO CORN SALAD. I was making some oven roasted tomatoes for my salad and suddenly, TING lit up a bulb above my head. There is really nothing to the dish. Its just some roasted tomatoes and cottage cheese. But it was yum, the roasted flavour of the tomato, slight hit from the mint and the creaminess of the cottage cheese. An ideal finger food for a small get together party. Simple yet delicious.


You Will Need:

For the Oven Roasted Tomatoes:

Firm Tomatoes Sliced
A tsp of Oil
Sea Salt
Pepper
Oregano

Other Ingredients:

Oregano to Sprinkle
Mint Leaves
Olive Oil (Optional)

The Cooking:

For roasting the tomatoes, coat a baking pan with oil and place the tomato slices. Sprinkle little sea salt, pepper and oregano over the tomato. Grill this in a preheated oven at 200c for 10 – 15 min or till the tomato is little soft and has shrunk a little in size.

Now place two tomato slices on a serving plate and place a mint leaf. Top it of with a cube of cottage cheese and sprinkle oregano. If you have olive oil, then you can dribble little over the cottage cheese when serving.

I have not given any precise measurements, because there is really nothing to measure. Just make as much as you require.
Happy Cooking!
3

Author

Search this blog