Friday, 20 March 2015

I had these in a restaurant very long time back and since then I wanted to try these. But was quite unsure if it would turn so crisp like the restaurant ones. Just gave a try and realized how easy it is. Crispy sweet corn kernels tosses in kind of  a Chinese stir fry. We just loved it and you can make it how spicy or saucy you like them.


You Will Need:
Boiled Corn Kernels from a Cob
A tbsp of corn flour
A tbsp of Maida
Salt & Pepper to Season
Oil for Deep Frying

Other Ingredients:
A tbsp of Oil
2 Green Chillies Finely Chopped
2 Sprigs of Spring Onion, Finely Chopped
2 Garlic Cloves, Finely Grates
A tso of Soy Sauce
A tsp of Tomato Ketchup
Pinch Salt
Little Chili Flakes

The Cooking:
Heat oil on high to deep fry. Mix the sweet corn kernels with corn flour, maida, salt and pepper. Just sprinkle little water and toss everything together.

NOTE: Adding too much of water will make the batter wetter and the corn kernels will clump together and won't separate when fried.

Now once the oil is hot, take handful of kernels and carefully sprinkle on to the hot oil. Fry till the corn becomes really crispy and crunchy.

Note: Do not crowd the oil by adding to much of corn. It will take much longer to get crisp and won't be crisp enough. Be careful since the corn may burst sometimes. So stand a feet away from the oil.

Once they turn nice crispy drain them on to a kitchen paper.

Heat tbsp of oil on a pan and add the green chilies, onions and garlic cloves. Saute on medium till the onions are soft. Then add soy, ketchup, salt and chili flakes. Saute for a min and add the fried corn kernels. Toll well till everything is well combined. Transfer to a plate and serve immediately.

Happy Blogging!


0

The cuisine of Udupi is plain delicious. And these buns are from the kitchen's of Udupi. The term "buns" are very misleading actually. When hubby mentioned he wants Mangalore Buns I thought them to be some kind of yeast savory buns. But when I looked up in the internet I was surprised to learn it had nothing to do with baking or yeasts. Its actually nothing but pooris that are flavoured with banana. I wonder how they came up with such a name. But I have to tell you I really loved it. Its super simple to make and it has this delicate sweet banana flavour coming through.


 You Will Need:
2 Cups of Plain Flour
1 Large Ripe Banana, Mashed
2 tbsp Yogurt
2 - 3 tbsp Powdered Sugar (according to your taste)
A tbsp of Powdered Almond (Optional, I Just added)
A Generous Pinch of Salt
1/2 tsp of Cardamom Powder
1/4 tsp of Baking Soda
A tbsp of Ghee
Oil to Deep Fry

The Cooking:
Place all the ingredients in a bowl and mix well to form a non sticky dough. Divide them into small balls and roll them out to a thickness of a 5 rupee coin. Its just like how you would make a poori. Heat oil in a kadai to deep fry. Once the oil is hot carefully drop in the buns. Gently slide the bun along the sit of the kadai to avoid hot oil splashing. Wait till the bun surfaces and once they surface from the bottom using your ladle splash the oil on the top. This helps them to puff up evenly. If you have made poori before it the same thing. Once fully puffed flip to other side and fry for few seconds till they are a light golden brown colour. Place them on a kitchen towel to absorb any excess oil.
Serve hot!

Happy Cooking!

1

Thursday, 12 March 2015

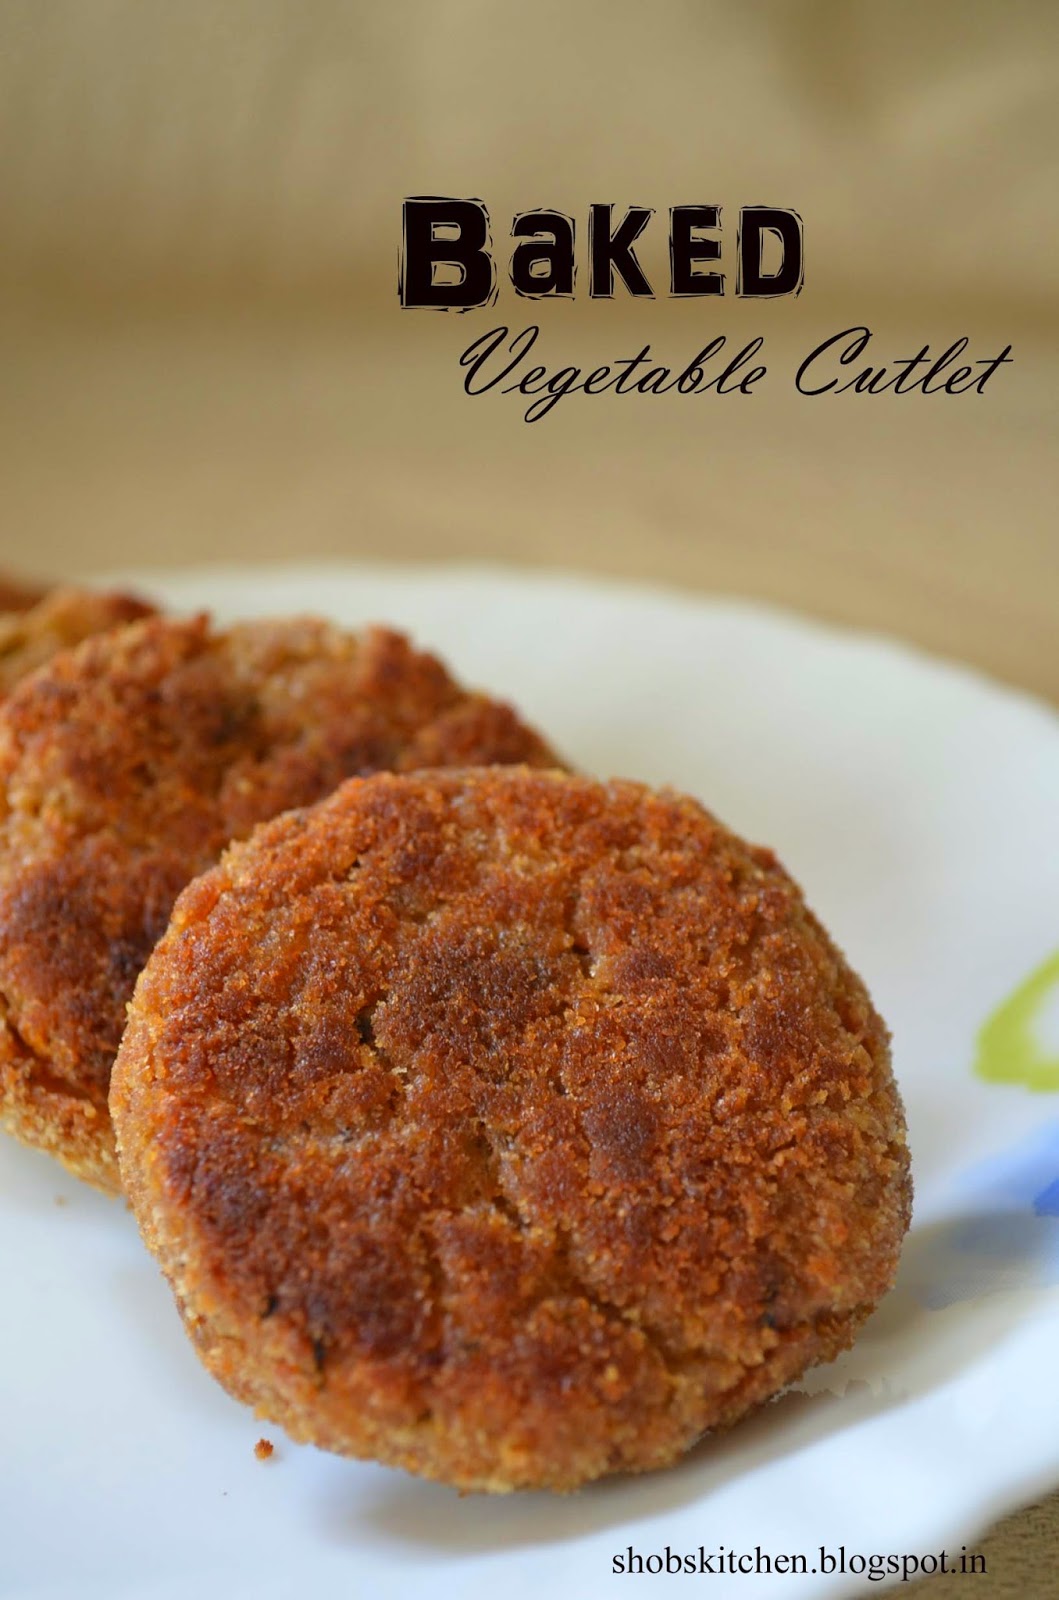
Cutlets brings back my school memories. I remember my mom making it for my after school snack and the smell of cutlets frying would hit me as soon as I enter the house. Her's are the best I have ever tasted. And cutlets were the only way she made me eat beets and french beans. Its been years since she made it again. And now I made them for Little A. And what an hit it was. Not only Little A loves it but his dad too. 


Cutlets are basically veggie patties that are shaped and crumb coated to deep fry. But I baked them.Cutlets are actually a healthy snack. Why deep fry them and make them unhealthy? And baking is much more easier and there is no compromise on the crisp outside. There is one small trick to get crisp outside when baking cutlets and I will be telling you that later in the post.


I was so happy when I made these. It bought back a lot of old memories. Little A could not wait to eat these straight from the oven. He kept walking (Yes, he has just begun to walk unsupported) into the kitchen; asking me to lift him and he kept pointing the oven demanding he wanted one right now. 

You Will Need:
4 Medium Sized Potatoes, Peeled, Cooked till Soft & mashed
1 Medium Sized Onion, Finely Chopped
1/2 tsp of Ginger Garlic Paste
1 Large Tomato, Finely Chopped
1 Large Carrot, Finely Chopped
6 French Beans, Finely Chopped
1/4 Cup of Cooked Peas
1 Small Beetroot, Finely Chopped
A tbsp of Finely Chopped Parsley / Coriander Leaves

***All the veggies can either be steamed beforehand or sauteed in the masala to cook. I prefer sauteing them.

Other Ingredients:
1/2 tsp Garam Masala
1/2 tsp of Cumin Powder
Salt to Taste
Some Freshly Cracked Pepper
Some vegetable Oil 
2 Cups of Plain Breadcrumbs, Homemade / Store-bought 
2 tbsp of Corn flour / flour 

The Cooking:
Step 1:
Making the Filling:
Heat a non - stick pan on High and add 2 tbsps of oil. Once hot add the onions and saute till pink and translucent. Then add the ginger garlic paste and saute for 2 mins. The onions SHOULD NOT BROWN. They just have to be soft and translucent. Then add the tomatoes and saute for 2 mins on high. Now add the salt, black pepper, garam masala and cumin powder. Saute for a min or so till the spices are cooked. Then tumble in the finely chopped carrots, beans & beets. Mix well and add little water and cover to cook the veggies. Since they are finely chopped they cook quickly with very less water. After 5 mins give a good stir and cook till any excess water has Vaporized. 

Now add the peas and chopped parsley. Mix well. The veggies should be dry at this stage. Add the mashed potato and mix well until the vegetables are well combined with the potatoes. At this point sprinkle over 2 tbsp of breadcrumbs. They absorb any excess water if any. Mix well on low heat and check seasoning. Take off heat and let it cool.

Step 2:
Make the slurry: 
You can either use one beaten egg or cornflour slurry to roll the cutlets. To make the slurry just place the flour on a shallow plate / bowl and add little water to make a thin paste. The slurry should not be runny but little thin. Keep aside.

Step 3:
Making the Cutlets:
Once the filling is cool enough to handle made balls out of them and mold to a cutlet shape. You can even use an oiled cookie cutter to make different shapes. 

Place the breadcrumbs in a plate. Take a cutlet and dip it in the slurry prepared earlier. Then roll them over the breadcrumbs. Pat the breadcrumbs well into the cutlet and shake off the excess. Repeat this for the entire batch. At this point you can either straight away bake them or refrigerate them for later. To freeze just place them in ziploc and freeze. 

Step 4:
Baking the Cutlets:
Preheat oven to 200 degree celcius 
Take a baking tray and line with foil. Brush oil over the foil. Now place the cutlets an inch apart and brush them throughly top, bottom and sides of the cutlet with oil. This is the key for getting crisp cutlets. You don't have to generously brush them with oil but just so they coat well. 

Place it in the hot oven for 35 - 40 mins flipping them over half way through. Once they are golden brown take them off and serve with tomato ketchup!

Happy Cooking!


0

Monday, 9 March 2015

These Homemade Chicken Nuggets are out of the world. Moist in the inside and crunchy on the outside. These make quick starters when you have guests around. And I must tell you how much little A liked it. He is more of a fish lover than a chicken lover. But this time he just devoured these. These need very little ingredients and no marination time (but you can if you want to). 


Nuggets have breadcrumb coating. And for this recipe I actually coated the chicken with a mix of breadcrumb and crushed plain corn flakes for that extra crunch. I used Homemade Breadcrumbs, never really liked store bought ones. 


P.S. 
DO NOT confuse this with KFC chicken. Though it looks like one it is NOT KFC! 

You Will Need:
500g Boneless Chicken fillet
1/2 Cup of Thick Yogurt, Whisked
A tsp of Italian Seasoning 
Salt to Taste
Freshly Cracked Pepper to Season
Oil to Deep fry

For the Crumb Coating:
4 - 5 Bread Slices
A Cup of Cornflakes

The Cooking:

Cut the chicken into strips or cubes and pat dry. Mix the chicken with yogurt, seasoning, salt & pepper. Keep Aside. Its not mandatory to marinate the chicken. You can of course prepare this well ahead if you are serving guests later.

Place the bread and cornflakes in a food processor and blitz till fine. I actually crumbled the bread and crushed the cornflakes by hand. So to get a very rustic looking coating. You can do either whichever you like. Spread the crumb coating on a plate. Meanwhile heat oil to deep fry.

Now roll the chicken over the crumb coating one at a time. Make sure to gently press the chicken for an even coat. Shake off the excess and place it on a plate. Once the oil is hot deep fry in batches till the chicken is cooked through and crisp. Deep fry on medium heat to make sure the coating does not brown too soon.

Once done place the chicken on a kitchen paper to drain off the excess oil.Serve hot with a dip or just as it is. 

Happy Cooking! 

0

I always have a day old or stale bread laying around in my kitchen counter. And the best you can do with it is made some Breadcrumbs. I have never liked the store bought ones. I find them to be too fine and sweet. I like how I can control the texture of the crumbs.  I can make it fine or a bit coarse; seasoned or just plain. 

How to Make Breadcrumbs?
Take some day old bread. It can be white bread or whole wheat or brown bread. I even use a combination of both white and whole wheat bread. But Never use sweet bread. Just roughly tear it and throw it in a food processor. Close the lid and just process until how you want them to be. Transfer it to an air tight container or a Ziploc bag and use according to the recipe.

Freezing Breadcrumbs:
Once the breadcrumbs are done transfer them to a resealable bag or an air tight container and simply place it in the freezer. These can be freezed up-to 3 months. At the time of using it let it thaw in the fridge and use accordingly. 

Refrigerating Breadcrumbs:
Breadcrumbs can be stored in the fridge for just few days.  

How to Make Seasoned Breadcrumbs:
  • Add some ground cumin, salt and paprika to the breadcrumbs for a spiced crumb.
  • Add some garlic powder, finely grated Parmesan or cheddar for a cheesy twist. 
  • Add some finely chopped thyme, rosemary, dill, parsley, sage, oregano for a herb crust. Alternatively you can also use dried herbs.
Happy Cooking!

0

Friday, 6 March 2015

Recently I have been on the lookout for healthy bakes for Little A. Since eating anything without offering him is impossible I take along some healthy snack for him during travel for him to munch on. Though these muffins are made with whole wheat flour and has less sugar I would limit this as a treat for babies. But for adults these are perfect if you want some yummy healthy snack on the go.  They are so moist and fluffy and amazingly easy to whip up and bake.


Makes a Dozen

You Will Need:

2.5 Cups of Whole Wheat Flour
1/3 Cup of Light Brown Sugar
1/3 Cup of Vegetable oil
1 tsp Baking Powder
1 tsp Baking Soda
1 tsp Vanilla Extract
A Pinch of Ground Cinnamon
1 Large Egg
1.5 Cups of Finely Chopped Apples with Skin
1 Cup of Buttermilk***
A Generous Pinch of Salt

Muffin Topping (Optional, I simply skipped):
Cinnamon
Sugar
Melted Butter

The Baking:

Preheat oven to 180 Degree Celcius and grease a muffin pan.
In a large bowl pour in the oil, buttermilk, brown sugar, vanilla and egg. Whisk this till smooth using a hand blender / wire whisk. In another bowl sift in whole wheat flour, baking powder, baking soda, salt and cinnamon. Now simply add the dry ingredients into the wet ingredients and mix until just combined. 

NOTE: This is a very thick batter almost like a dough. But DO NOT OVERMIX or add excess liquid. If overmixed or batter made a little thin the muffins will turn out dense and hard.

Finally fold in the apples and spoon into the greased muffin tin using a table spoon or an ice cream scoop (this works best for me). Fill the muffin batter all the way to the top so that they raise high. Now if you are making the muffin topping, generously spoon over each muffin and bake in a preheated oven for 15 mins or until a cake tester inserted in the middle comes out clean and the top is crunchy.

***Substitution for Buttermilk.
Take 1 cup of milk and add a tbsp of vinigar / lime juice. Let it for rest for 10 mins before using in the recipe.
OR
Take ¾ cup of milk and stir in ¼ cup of yogurt. Mix and use in the recipe.


Happy Baking!
0

Author

Search this blog